> ## Documentation Index
> Fetch the complete documentation index at: https://docs.getunblocked.com/llms.txt
> Use this file to discover all available pages before exploring further.
# Set up and configuration
> Configure Code Review settings for your team
## Setting up Code Review
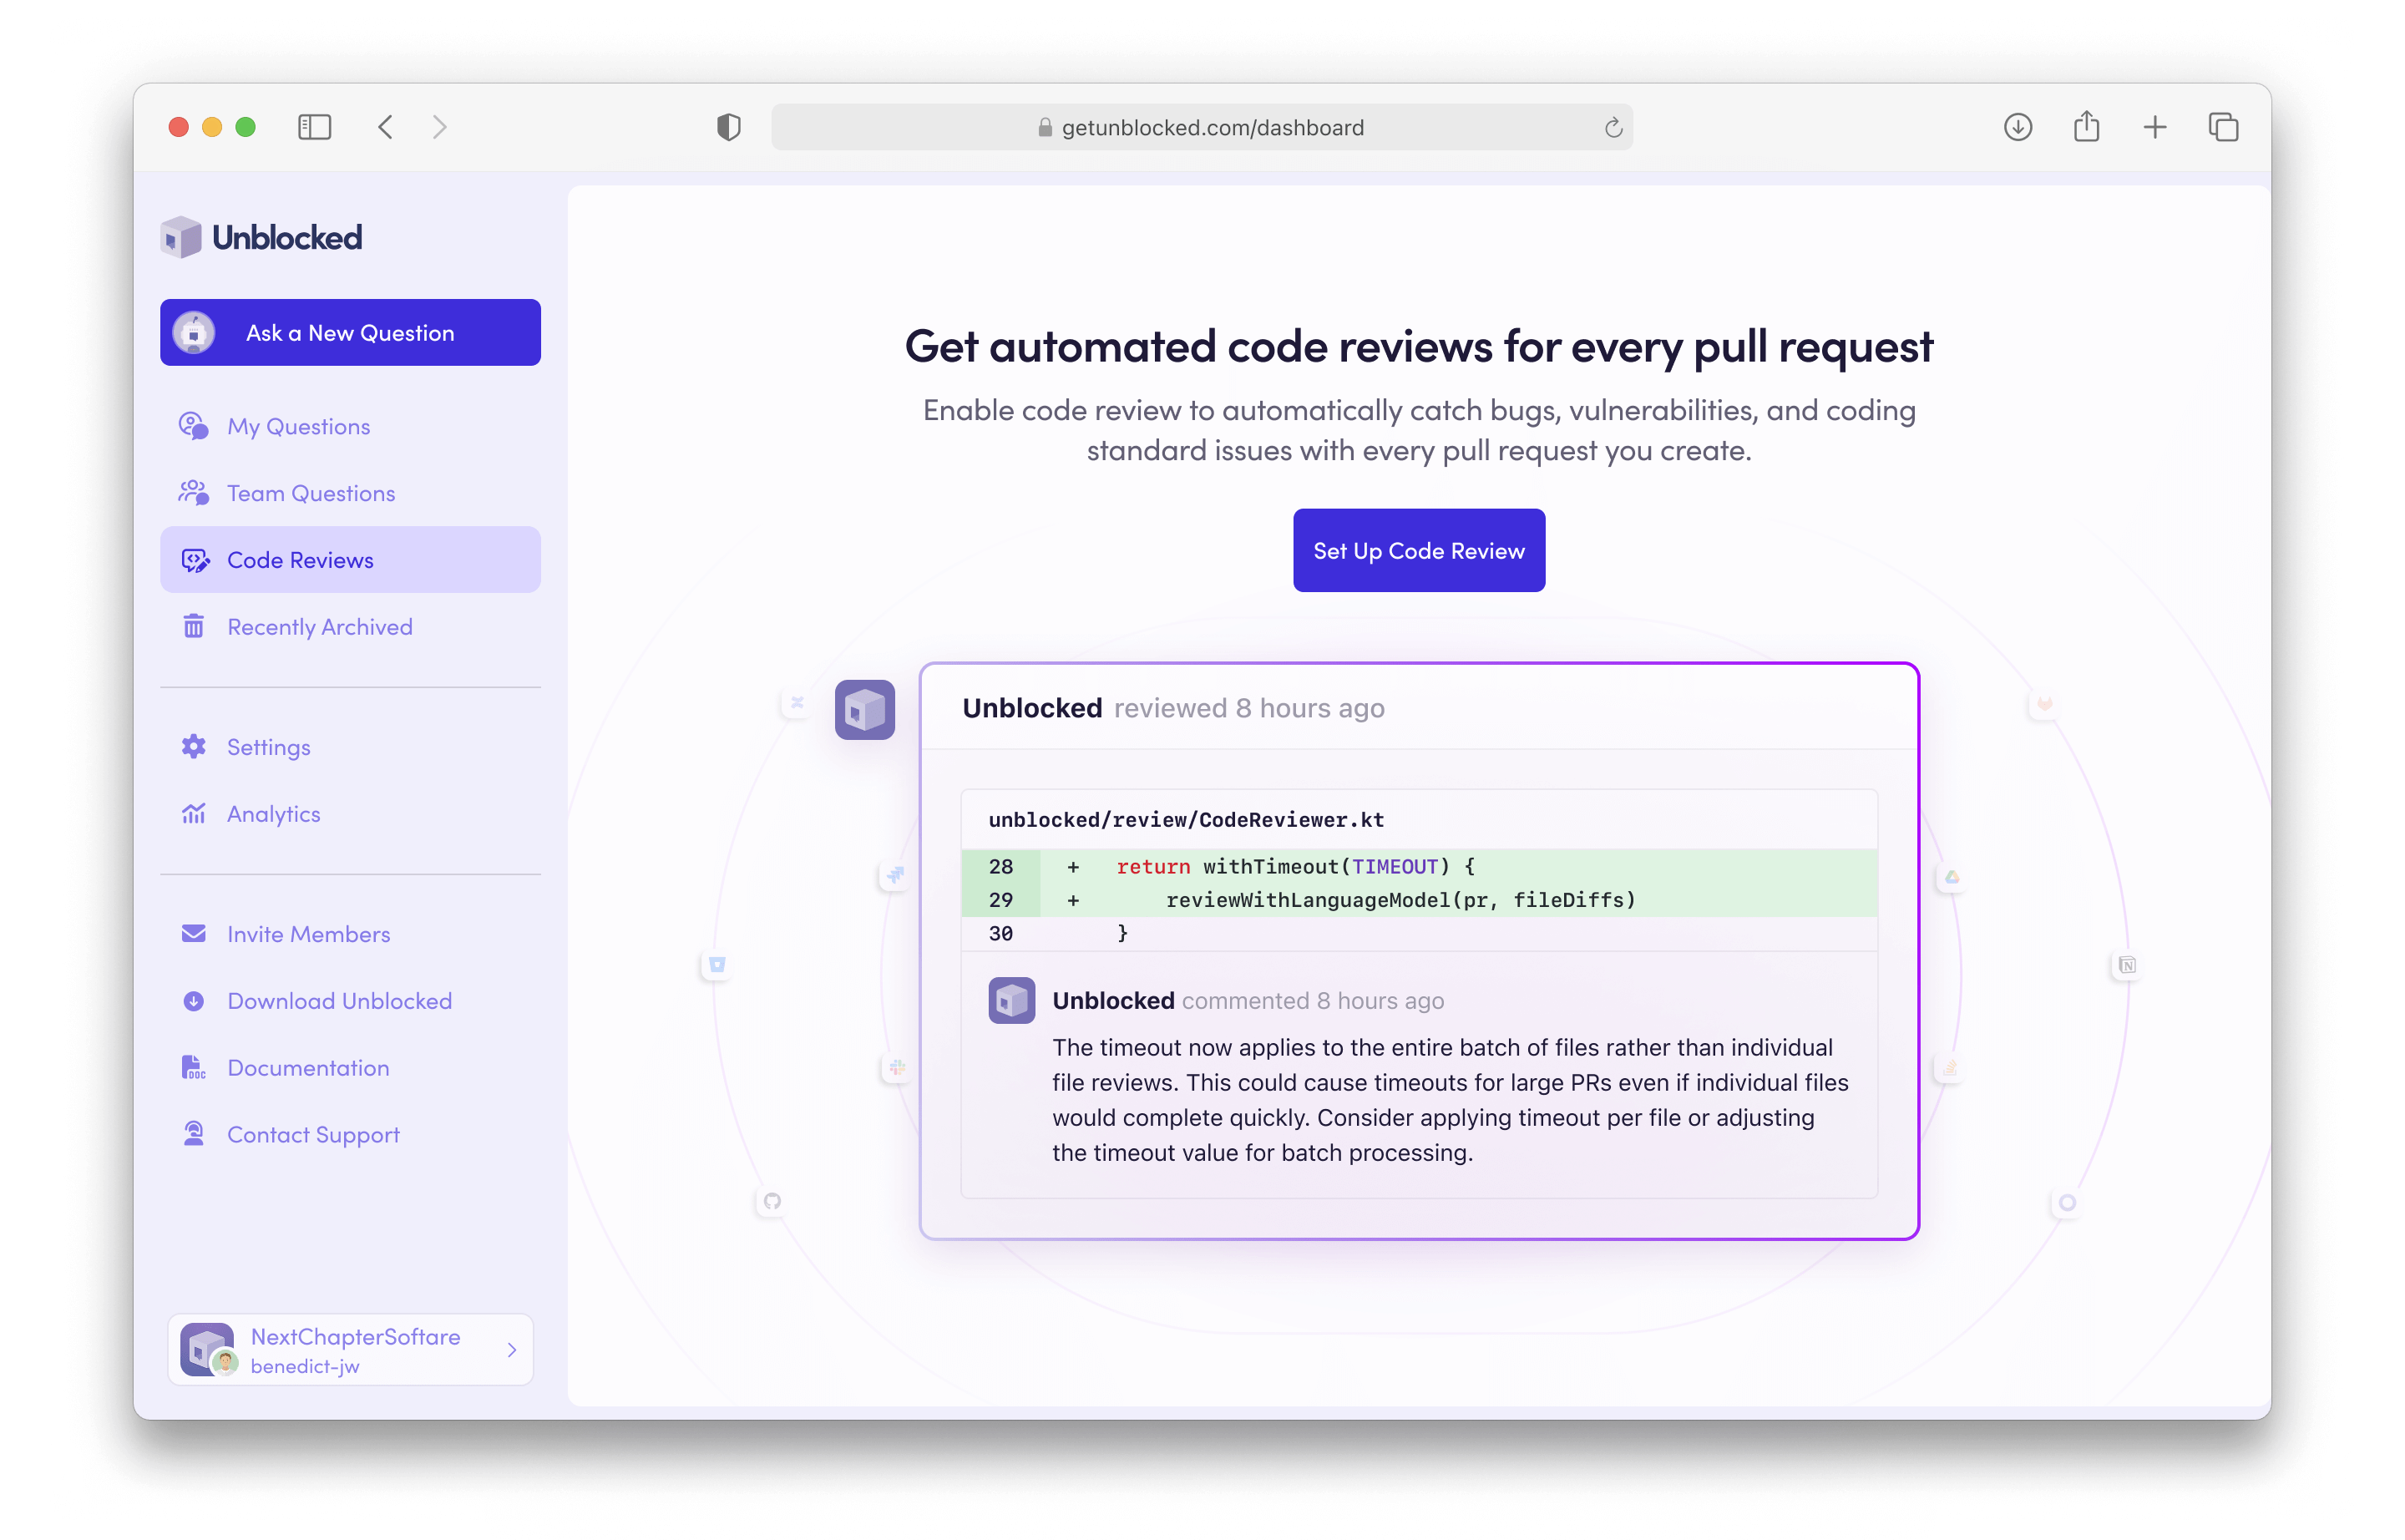
To set up Code Review for your Unblocked team, select Code Review from the left sidebar. Next, click **Set Up Code Review**. If you haven't connected your issue tracker, you'll be prompted to do so.
 ## Configure Code Review
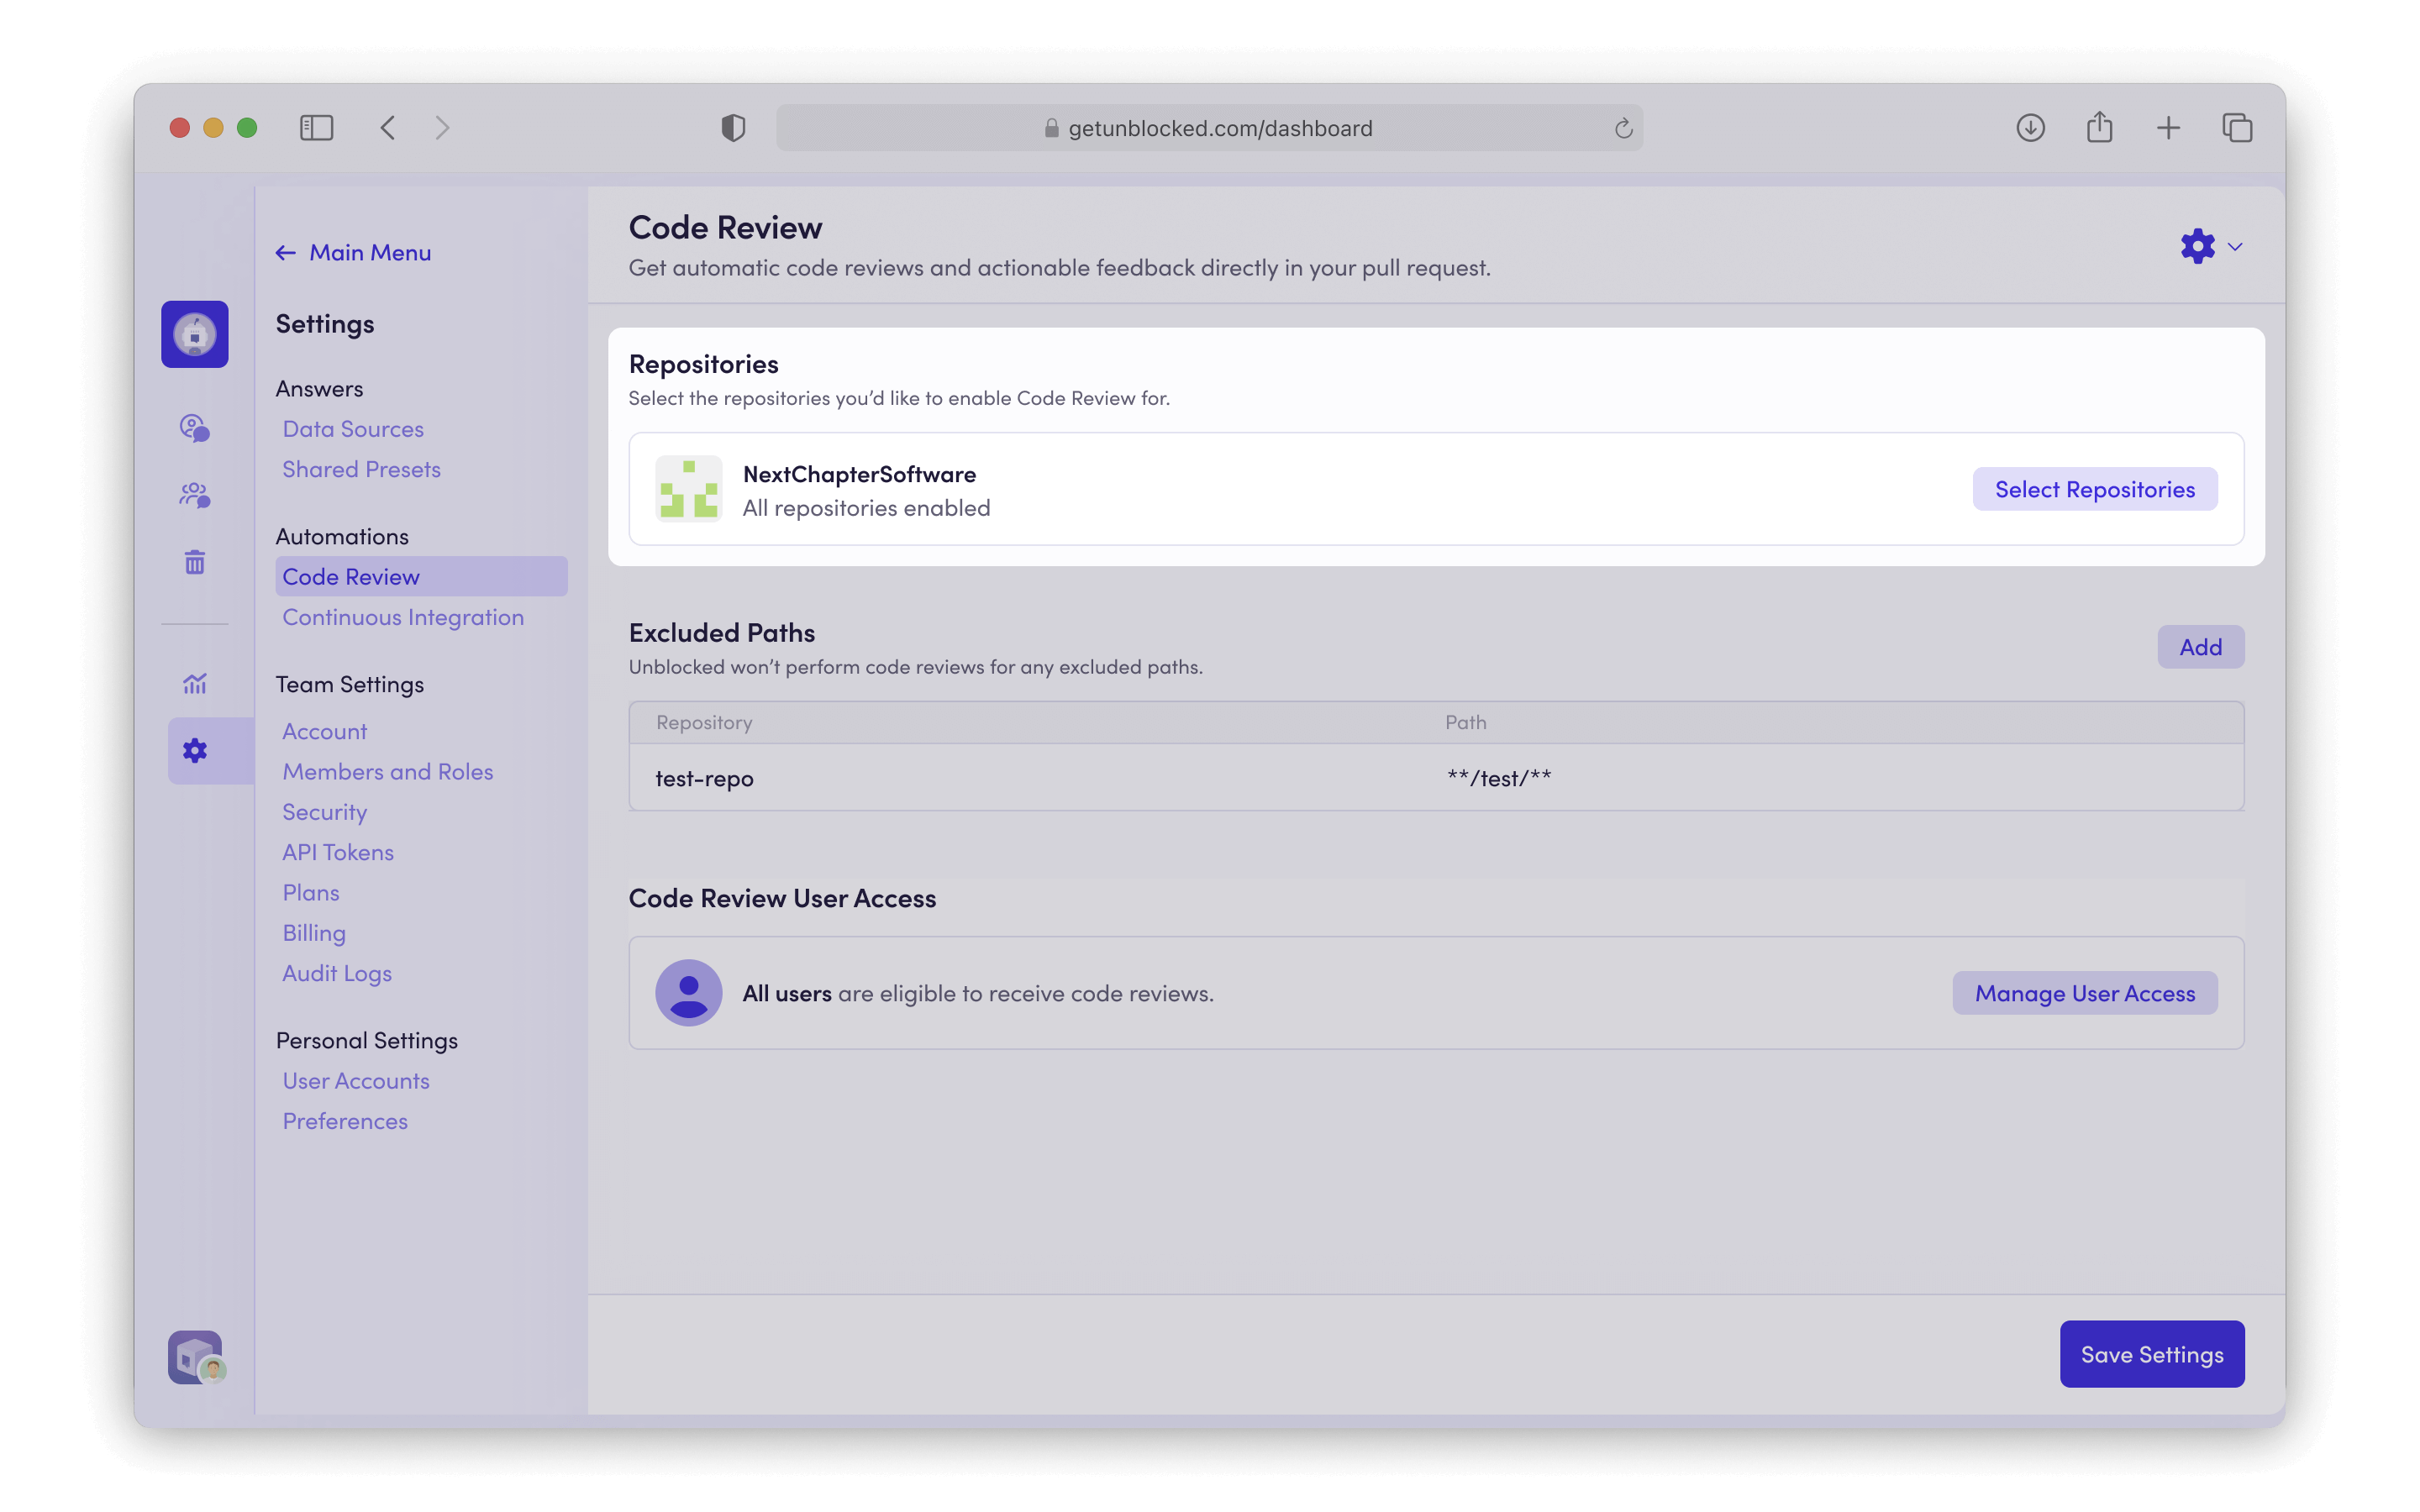
Once Code Review is enabled, you can adjust the settings to control how reviews are conducted. Click **Settings** in the sidebar, then select **Code Review**.
### Select repositories
Unblocked will automatically review pull requests only for repositories you select.
## Configure Code Review
Once Code Review is enabled, you can adjust the settings to control how reviews are conducted. Click **Settings** in the sidebar, then select **Code Review**.
### Select repositories
Unblocked will automatically review pull requests only for repositories you select.
 ### Code Review user access
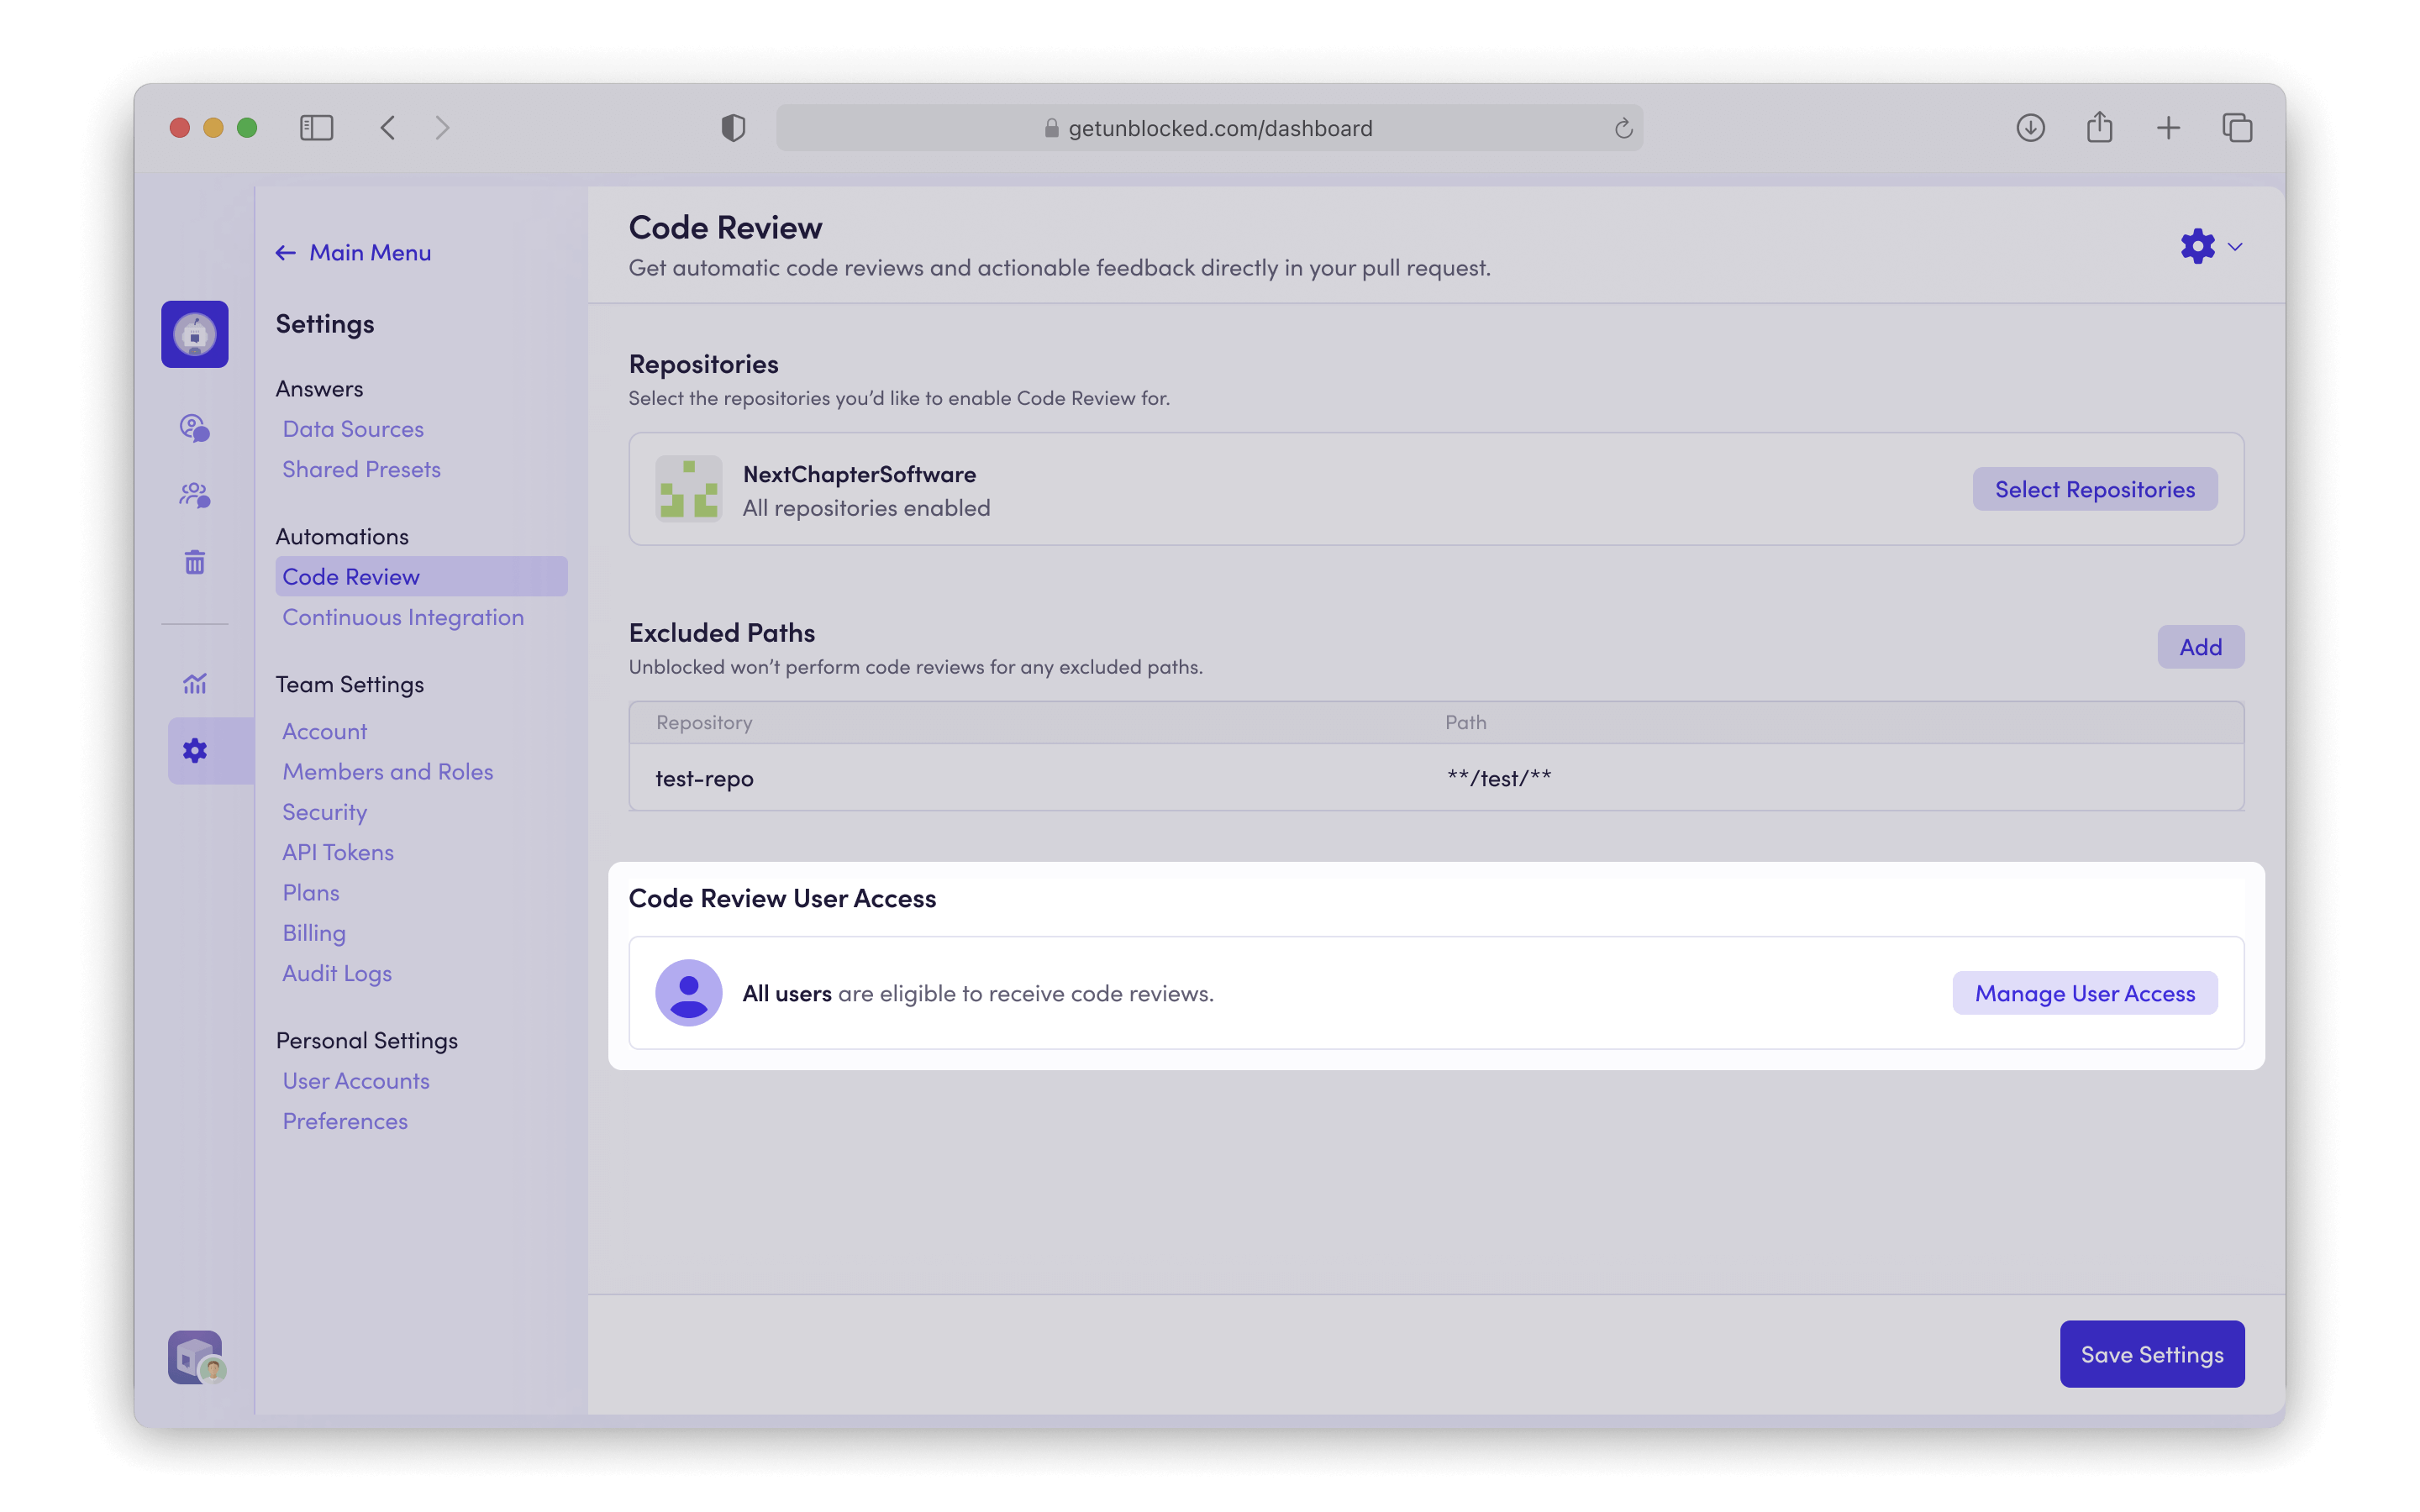
Use the **Code Review User Access** setting to control which users are eligible to receive automated code reviews.
By default, **All Users** is selected, so Unblocked will review pull requests for everyone in your workspace.
To limit reviews to specific people, choose **Specific Users** and select the users you want from the list.
Only pull requests authored by those users will receive automated code reviews.
Users who are not selected can still request a review manually by mentioning `@unblocked` in a PR comment. See [Requesting a review](/code-review/how-it-works#requesting-a-review-or-summary-with-%40unblocked) for details.
### Code Review user access
Use the **Code Review User Access** setting to control which users are eligible to receive automated code reviews.
By default, **All Users** is selected, so Unblocked will review pull requests for everyone in your workspace.
To limit reviews to specific people, choose **Specific Users** and select the users you want from the list.
Only pull requests authored by those users will receive automated code reviews.
Users who are not selected can still request a review manually by mentioning `@unblocked` in a PR comment. See [Requesting a review](/code-review/how-it-works#requesting-a-review-or-summary-with-%40unblocked) for details.
 ### Approval workflow
Use the **Approval Workflow** settings to control what happens when Unblocked reviews a pull request and finds no issues.
### Approval workflow
Use the **Approval Workflow** settings to control what happens when Unblocked reviews a pull request and finds no issues.
 * **Risk Assessment** — learn how to [define risk policies](/code-review/risk-assessment) that Unblocked evaluates against every pull request.
* **Comment** — post a comment when no issues are found. Turn this off if you want Unblocked to take no action on pull requests that do not qualify for auto-approval.
* **Auto-approve low risk Pull Requests** — approve pull requests that have no issues and a risk score of `low` or `lowest`. This setting appears when your source control integration supports approvals that count toward pull request requirements.
* **Legacy Approvals** — approve pull requests that have no issues for GitHub organizations whose Unblocked integration does not have the `contents:write` permission. These approvals do not count toward required approvals.
Low-risk auto-approvals count toward the number of approvals required by branch protection rules.
If your rules require only one approval, an Unblocked auto-approval can satisfy that requirement. Configure additional required approvals if you also require a human reviewer to approve the pull request. Legacy Approvals do not count toward required approvals.
### Custom rules
To have Unblocked follow repository instructions during code review, enable repository rules under **Settings** > **Code Review**. Unblocked supports a broad range of instruction files and paths; expand the list below to see which ones it recognizes.
**Markdown instruction files**
```text theme={null}
AGENT.md
AGENTS.md
AGENTS.override.md
ARCHITECTURE.md
CLAUDE.md
CODE_STYLE.md
CONTRIBUTING.md
CONVENTIONS.md
GEMINI.md
replit.md
STYLE.md
STYLEGUIDE.md
TESTING.md
```
Lowercase forms are also recognized for AGENT.md, AGENTS.md, ARCHITECTURE.md, CLAUDE.md, CONTRIBUTING.md, CONVENTIONS.md, and GEMINI.md.
**Tool rule files**
```text theme={null}
.augment-guidelines
.clinerules
.continuerules
.cursorrules
.goosehints
.roorules
.rules
.windsurfrules
```
```text theme={null}
.claude/CLAUDE.md
.gemini/styleguide.md
.github/copilot-instructions.md
.idx/airules.md
.junie/guidelines.md
.vscode/cody.json
```
| Directory | Pattern |
| - | - |
| `.agent/rules` | `*.md` |
| `.agents` | `*.md` |
| `.aiassistant/rules` | `*.md` |
| `.amazonq/rules` | `*.md` |
| `.augment/rules` | `*.md` |
| `.claude/rules` | `*.md` |
| `.clinerules` | `*.md` |
| `.continue/rules` | `*.md` |
| `.cursor/rules` | `*.md`, `*.mdc` |
| `.github/instructions` | `*.instructions.md`, `*.md` |
| `.github/rules` | `**/*.md` |
| `.qdeveloper` | `*.md` |
| `.roo/rules` | `*.md` |
| `.roo/rules-architect` | `*.md` |
| `.roo/rules-ask` | `*.md` |
| `.roo/rules-code` | `*.md` |
| `.roo/rules-debug` | `*.md` |
| `.tabnine/guidelines` | `*.md` |
| `.windsurf/rules` | `*.md` |
```text theme={null}
**/AGENT.md
**/AGENTS.md
**/AGENTS.override.md
**/CLAUDE.md
**/GEMINI.md
**/.agents/*.md
**/.rules/*
```
#### Examples
For best results, write concise, actionable instructions that reflect your repository and organization’s specific practices rather than general truisms.
Good examples:
* “Use `event.id` for idempotent event processing.”
* “In customer-facing views, format dates with `formatNorthstarDate` and the account’s timezone.”
* “Use `Money` for monetary values; avoid floating-point arithmetic.”
Avoid vague review instructions that do not give the reviewer factual guidance:
* “Review API changes carefully.”
* “Check for security and correctness issues.”
* “Make sure database changes are safe.”
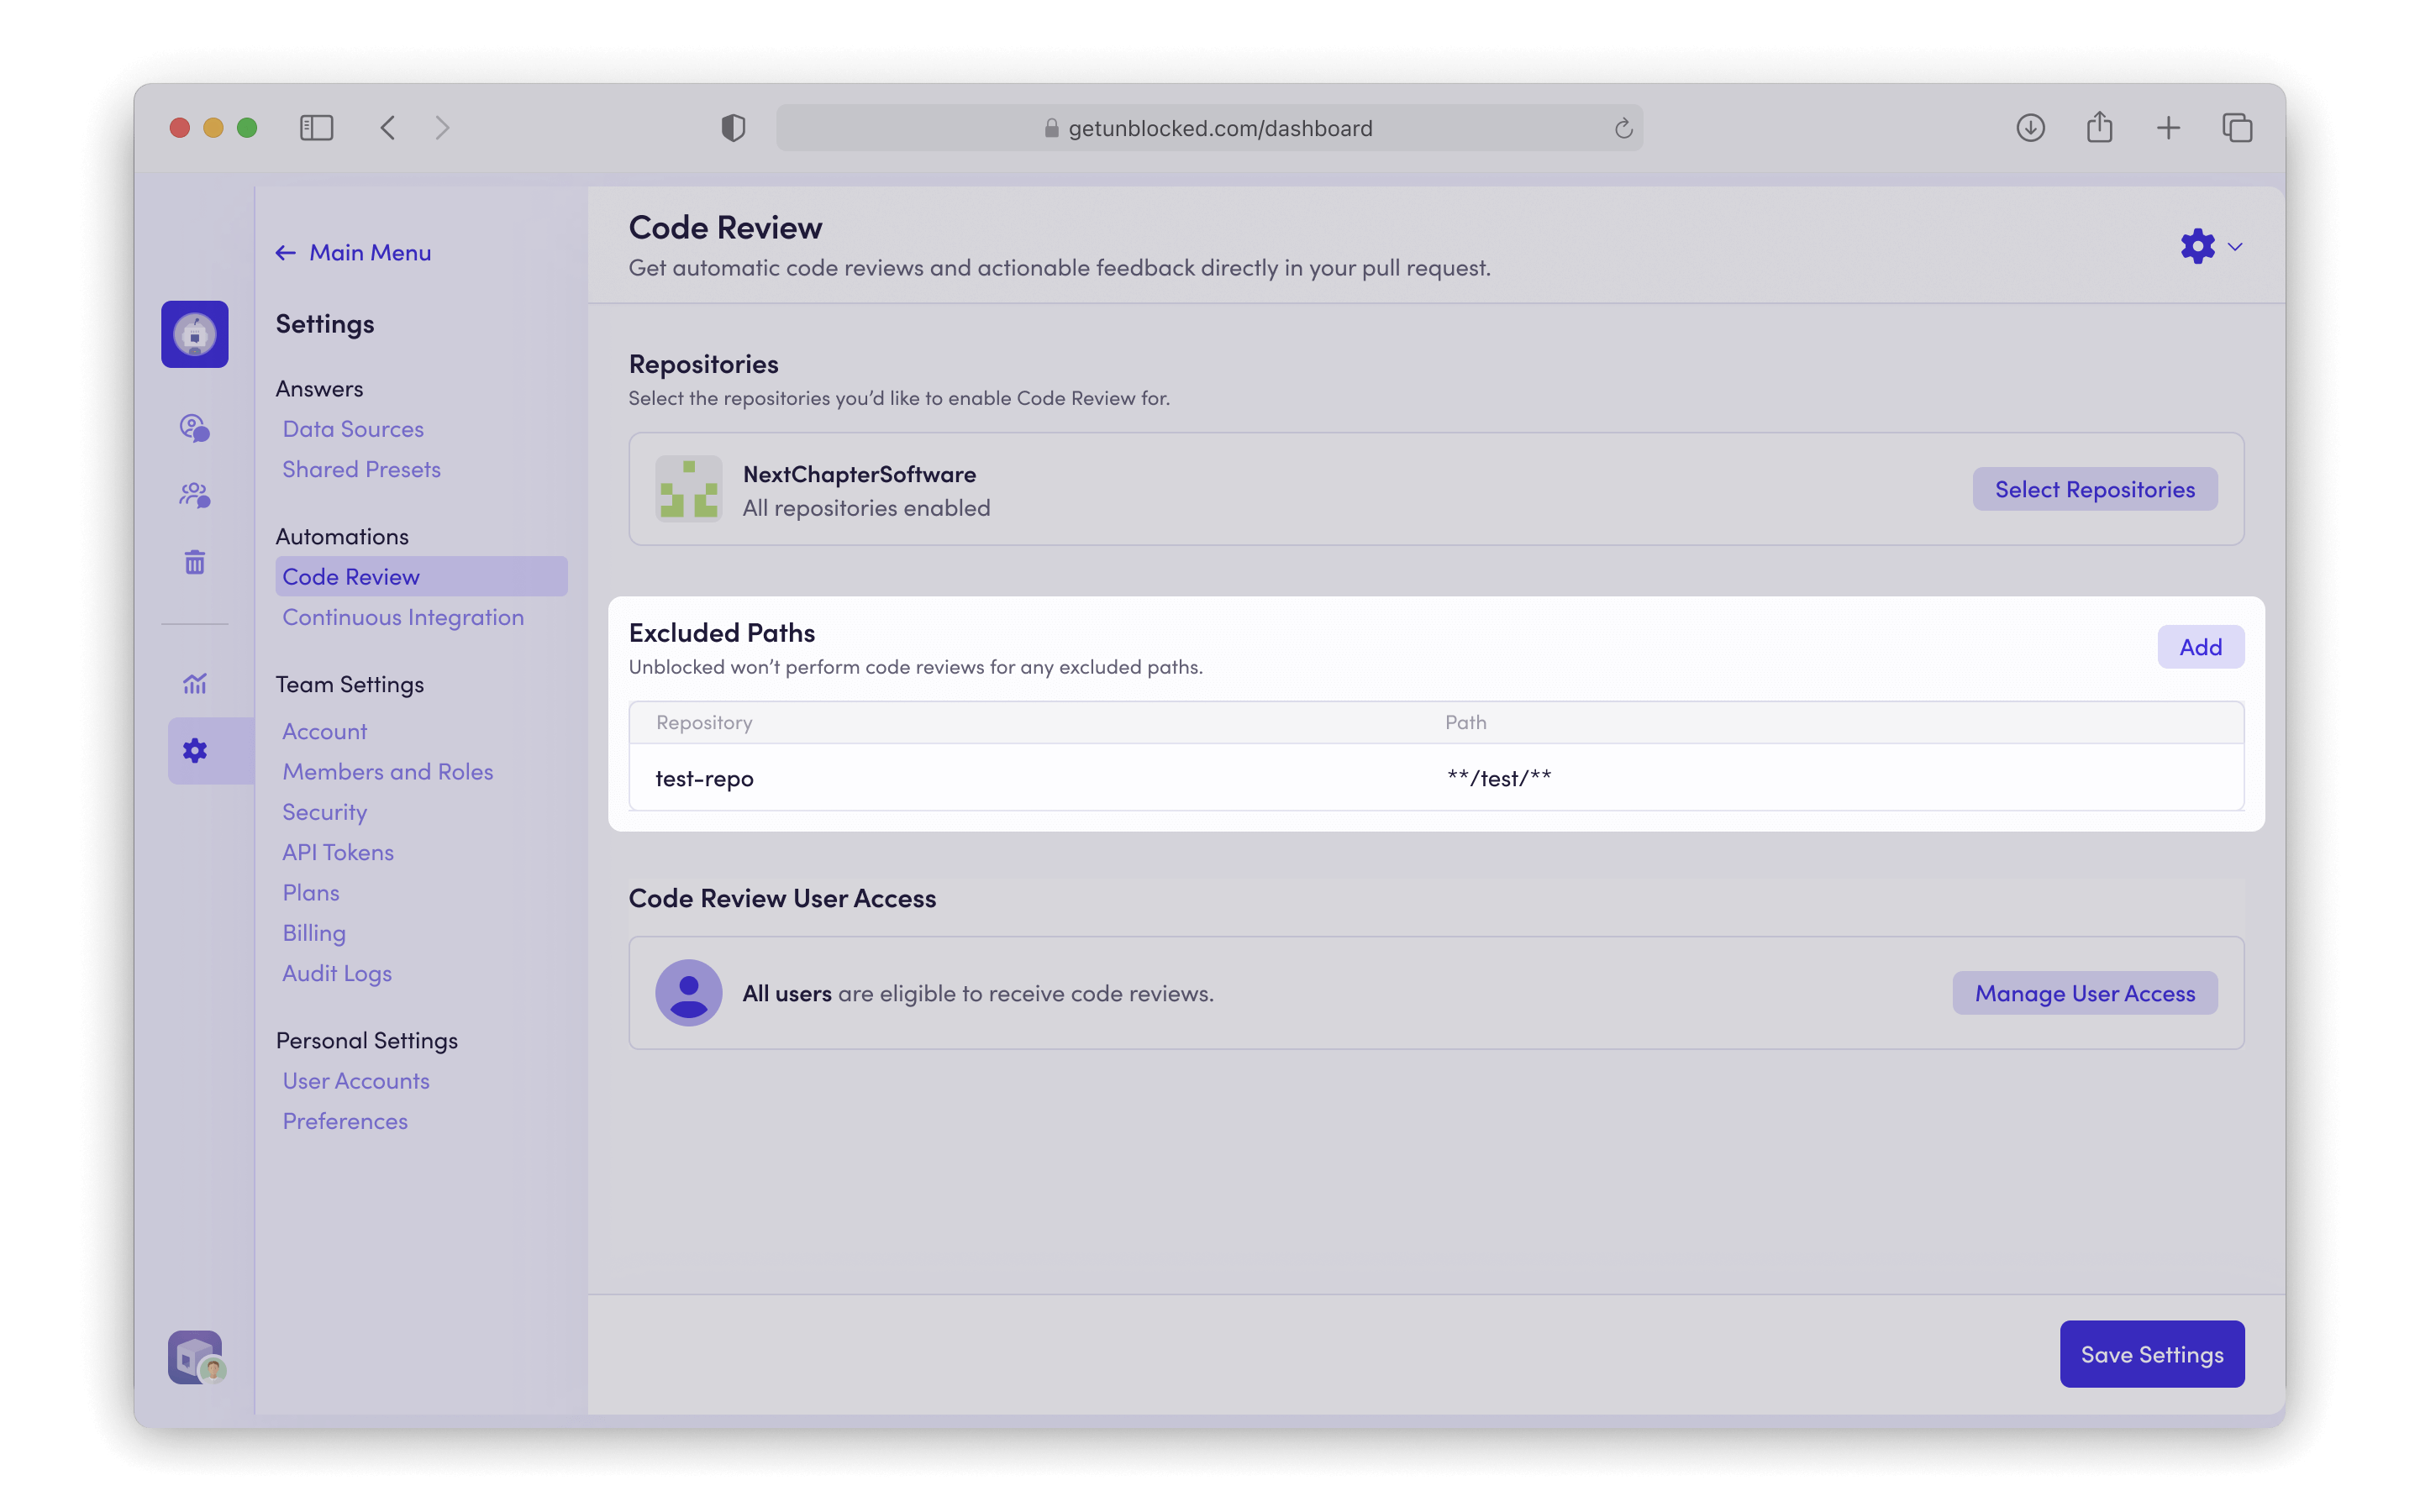
### Excluded paths
You can configure custom path exclusion patterns to exclude specific files or directories from review.
These patterns use glob syntax and are applied when processing pull requests.
Common exclusion patterns include `*.md` to exclude all Markdown files at any depth, `src/test/**` to exclude all files under a specific directory from the repository root, and `package-lock.json` to exclude specific files. You can also exclude entire directories like `node_modules/**` or file types like `*.generated.js`.
* **Risk Assessment** — learn how to [define risk policies](/code-review/risk-assessment) that Unblocked evaluates against every pull request.
* **Comment** — post a comment when no issues are found. Turn this off if you want Unblocked to take no action on pull requests that do not qualify for auto-approval.
* **Auto-approve low risk Pull Requests** — approve pull requests that have no issues and a risk score of `low` or `lowest`. This setting appears when your source control integration supports approvals that count toward pull request requirements.
* **Legacy Approvals** — approve pull requests that have no issues for GitHub organizations whose Unblocked integration does not have the `contents:write` permission. These approvals do not count toward required approvals.
Low-risk auto-approvals count toward the number of approvals required by branch protection rules.
If your rules require only one approval, an Unblocked auto-approval can satisfy that requirement. Configure additional required approvals if you also require a human reviewer to approve the pull request. Legacy Approvals do not count toward required approvals.
### Custom rules
To have Unblocked follow repository instructions during code review, enable repository rules under **Settings** > **Code Review**. Unblocked supports a broad range of instruction files and paths; expand the list below to see which ones it recognizes.
**Markdown instruction files**
```text theme={null}
AGENT.md
AGENTS.md
AGENTS.override.md
ARCHITECTURE.md
CLAUDE.md
CODE_STYLE.md
CONTRIBUTING.md
CONVENTIONS.md
GEMINI.md
replit.md
STYLE.md
STYLEGUIDE.md
TESTING.md
```
Lowercase forms are also recognized for AGENT.md, AGENTS.md, ARCHITECTURE.md, CLAUDE.md, CONTRIBUTING.md, CONVENTIONS.md, and GEMINI.md.
**Tool rule files**
```text theme={null}
.augment-guidelines
.clinerules
.continuerules
.cursorrules
.goosehints
.roorules
.rules
.windsurfrules
```
```text theme={null}
.claude/CLAUDE.md
.gemini/styleguide.md
.github/copilot-instructions.md
.idx/airules.md
.junie/guidelines.md
.vscode/cody.json
```
| Directory | Pattern |
| - | - |
| `.agent/rules` | `*.md` |
| `.agents` | `*.md` |
| `.aiassistant/rules` | `*.md` |
| `.amazonq/rules` | `*.md` |
| `.augment/rules` | `*.md` |
| `.claude/rules` | `*.md` |
| `.clinerules` | `*.md` |
| `.continue/rules` | `*.md` |
| `.cursor/rules` | `*.md`, `*.mdc` |
| `.github/instructions` | `*.instructions.md`, `*.md` |
| `.github/rules` | `**/*.md` |
| `.qdeveloper` | `*.md` |
| `.roo/rules` | `*.md` |
| `.roo/rules-architect` | `*.md` |
| `.roo/rules-ask` | `*.md` |
| `.roo/rules-code` | `*.md` |
| `.roo/rules-debug` | `*.md` |
| `.tabnine/guidelines` | `*.md` |
| `.windsurf/rules` | `*.md` |
```text theme={null}
**/AGENT.md
**/AGENTS.md
**/AGENTS.override.md
**/CLAUDE.md
**/GEMINI.md
**/.agents/*.md
**/.rules/*
```
#### Examples
For best results, write concise, actionable instructions that reflect your repository and organization’s specific practices rather than general truisms.
Good examples:
* “Use `event.id` for idempotent event processing.”
* “In customer-facing views, format dates with `formatNorthstarDate` and the account’s timezone.”
* “Use `Money` for monetary values; avoid floating-point arithmetic.”
Avoid vague review instructions that do not give the reviewer factual guidance:
* “Review API changes carefully.”
* “Check for security and correctness issues.”
* “Make sure database changes are safe.”
### Excluded paths
You can configure custom path exclusion patterns to exclude specific files or directories from review.
These patterns use glob syntax and are applied when processing pull requests.
Common exclusion patterns include `*.md` to exclude all Markdown files at any depth, `src/test/**` to exclude all files under a specific directory from the repository root, and `package-lock.json` to exclude specific files. You can also exclude entire directories like `node_modules/**` or file types like `*.generated.js`.
 ### Select a bot account
For Azure DevOps repositories, code review comments need to be posted on behalf of an Azure DevOps user account. We recommend creating an Unblocked bot account for this specific purpose.
* In the Microsoft Entra admin center, go to **Entra ID** > **Users**.
* Click **New user**, then select **Create new user**.
* Create a new user with the following information:
* **Name:** Unblocked
* **Avatar:** download and use the Unblocked logo below
### Select a bot account
For Azure DevOps repositories, code review comments need to be posted on behalf of an Azure DevOps user account. We recommend creating an Unblocked bot account for this specific purpose.
* In the Microsoft Entra admin center, go to **Entra ID** > **Users**.
* Click **New user**, then select **Create new user**.
* Create a new user with the following information:
* **Name:** Unblocked
* **Avatar:** download and use the Unblocked logo below
 Download PNG
* In Azure DevOps, sign in to your organization as a *Project Collection Administrator*.
* Click **Organization settings** > **Users**, then click **Add users**.
* Enter the bot user's email address.
* Set **Access level** to **Basic**.
* Under **Add to projects**, select each project where Unblocked should review pull requests.
* Set **Azure DevOps Groups** to **Project Contributors**.
* Click **Add**.
In Unblocked, search for the bot account you just created and select it. You may be required to authorize this account with Unblocked.
In order to successfully authorize your bot account, you need to be logged in with that account in Azure DevOps.
Download PNG
* In Azure DevOps, sign in to your organization as a *Project Collection Administrator*.
* Click **Organization settings** > **Users**, then click **Add users**.
* Enter the bot user's email address.
* Set **Access level** to **Basic**.
* Under **Add to projects**, select each project where Unblocked should review pull requests.
* Set **Azure DevOps Groups** to **Project Contributors**.
* Click **Add**.
In Unblocked, search for the bot account you just created and select it. You may be required to authorize this account with Unblocked.
In order to successfully authorize your bot account, you need to be logged in with that account in Azure DevOps.
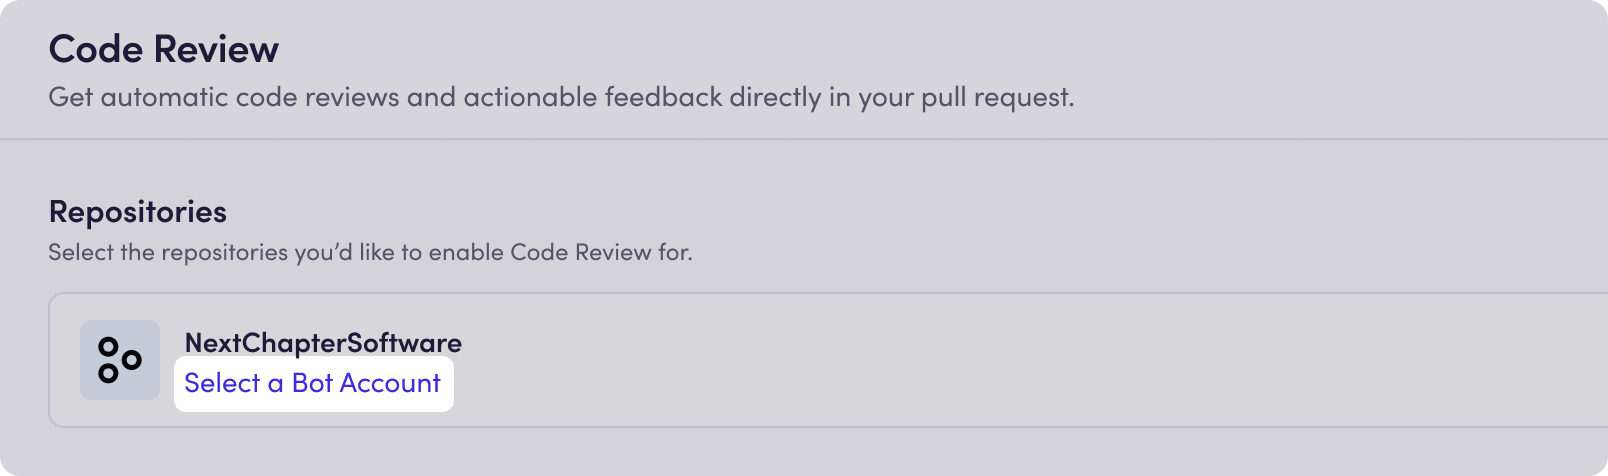 For Bitbucket Cloud repositories, code review comments need to be posted on behalf of a Bitbucket user account. We recommend creating an Unblocked bot account for this specific purpose.
* [Create a new account](https://id.atlassian.com/signup?application=bitbucket\&continue=https%3A%2F%2Fbitbucket.org\&prompt=select_account) in Bitbucket with the following information:
* **Name:** Unblocked
* **Avatar:** download and use the Unblocked logo below
Download PNG
* [Switch accounts](https://id.atlassian.com/login/select-account?application=bitbucket\&continue=https%3A%2F%2Fbitbucket.org) and sign in to your Bitbucket Workspace as a Workspace admin.
* Click the gear icon in the top right of the navigation bar, and select **User Management**.
* Invite your new bot user to your workspace.
* Accept the email invitation that was sent to your bot account.
In Unblocked, search for the bot account you just created and select it. You may be required to authorize this account with Unblocked.
In order to successfully authorize your bot account, you need to be logged in with that account in Bitbucket Cloud.
For Bitbucket Data Center repositories, code review comments need to be posted on behalf of a Bitbucket Data Center user account. We recommend creating an Unblocked bot account for this specific purpose.
* **Sign in** as an administrator in your Bitbucket Data Center instance.
* In the top navigation bar, click the admin icon.
* Under **Accounts**, select **Users**, then **Create user**.
* Create a new user account in Bitbucket Data Center with the following information:
* **Name:** Unblocked
* **Avatar:** download and use the Unblocked logo below
Download PNG
* Before the bot can access a project, it must be able to sign in to Bitbucket Data Center.
* Go to **Administration** > **Users**.
* Find your bot user and ensure it is assigned to a group.
* Go to **Administration** > **Global Permissions**.
* Ensure that group has the **Bitbucket User** permission.
* For each project Unblocked should review, navigate to **Project settings** > **Permissions**.
* Add the bot user and set the permission as "**Developer**" or above.
In Unblocked, search for the bot account you just created and select it. You may be required to authorize this account with Unblocked.
In order to successfully authorize your bot account, you need to be logged in with that account in Bitbucket Data Center.
For GitLab Cloud repositories, code review comments need to be posted on behalf of a GitLab account. We recommend creating an Unblocked bot account for this specific purpose.
You can use either a GitLab service account or a regular GitLab user account.
Regular users connect with OAuth, while service accounts connect with a token.
Decide which GitLab account type Unblocked should use for code review, then follow the matching instructions.
**GitLab service account**
* Create a [GitLab service account](https://docs.gitlab.com/user/profile/service_accounts/) for the top-level group.
* Create a token for the service account:
* From the service account page, select **Manage access tokens**.
* Click **Add new token**.
* Select the **api** and **read\_user** scopes.
* Click **Generate token** and copy the token.
**Regular GitLab user account**
* Create a new account in GitLab.
* In GitLab, set the regular user's profile information:
* **Name:** Unblocked
* **Avatar:** download and use the Unblocked logo below
Download PNG
* In GitLab, **sign in** as an Owner for the top-level group that contains the repositories Unblocked should review.
* In the top-level group, click **Manage** in the left navigation and select **Members**.
* Click **Invite members**.
* Invite the GitLab account you created for code review.
* Set the role as "**Developer**" or above and click "**Invite**".
In Unblocked, search for the GitLab account you created for code review and select it. If you select a regular user account, Unblocked will prompt you to authorize that account with GitLab. If you select a service account, Unblocked will prompt you to enter the token you created in GitLab.
Service accounts connect with a token and do not use the GitLab OAuth flow. Regular user accounts still use OAuth, so you need to be logged in to GitLab with that account when authorizing it.
For GitLab Self-Managed repositories, code review comments need to be posted on behalf of a GitLab account. We recommend creating an Unblocked bot account for this specific purpose.
You can use either a GitLab service account or a regular GitLab user account.
Regular users connect with OAuth, while service accounts connect with a token.
Decide which GitLab account type Unblocked should use for code review, then follow the matching instructions.
**GitLab service account**
* Create a [GitLab service account](https://docs.gitlab.com/user/profile/service_accounts/) in your GitLab instance.
* Create a token for the service account:
* From the service account page, select **Manage access tokens**.
* Click **Add new token**.
* Select the **api** and **read\_user** scopes.
* Click **Generate token** and copy the token.
**Regular GitLab user account**
* Create a new account in your GitLab instance.
* In GitLab Self-Managed, set the regular user's profile information:
* **Name:** Unblocked
* **Avatar:** download and use the Unblocked logo below
Download PNG
* In GitLab Self-Managed, **sign in** as an Owner or instance administrator for the top-level group that contains the repositories Unblocked should review.
* In the top-level group, click **Manage** in the left navigation and select **Members**.
* Click **Invite members**.
* Invite the GitLab account you created for code review.
* Set the role as "**Developer**" or above and click "**Invite**".
In Unblocked, search for the GitLab account you created for code review and select it. If you select a regular user account, Unblocked will prompt you to authorize that account with GitLab Self-Managed. If you select a service account, Unblocked will prompt you to enter the token you created in GitLab.
Service accounts connect with a token and do not use the GitLab OAuth flow. Regular user accounts still use OAuth, so you need to be logged in to GitLab with that account when authorizing it.
For Bitbucket Cloud repositories, code review comments need to be posted on behalf of a Bitbucket user account. We recommend creating an Unblocked bot account for this specific purpose.
* [Create a new account](https://id.atlassian.com/signup?application=bitbucket\&continue=https%3A%2F%2Fbitbucket.org\&prompt=select_account) in Bitbucket with the following information:
* **Name:** Unblocked
* **Avatar:** download and use the Unblocked logo below
Download PNG
* [Switch accounts](https://id.atlassian.com/login/select-account?application=bitbucket\&continue=https%3A%2F%2Fbitbucket.org) and sign in to your Bitbucket Workspace as a Workspace admin.
* Click the gear icon in the top right of the navigation bar, and select **User Management**.
* Invite your new bot user to your workspace.
* Accept the email invitation that was sent to your bot account.
In Unblocked, search for the bot account you just created and select it. You may be required to authorize this account with Unblocked.
In order to successfully authorize your bot account, you need to be logged in with that account in Bitbucket Cloud.
For Bitbucket Data Center repositories, code review comments need to be posted on behalf of a Bitbucket Data Center user account. We recommend creating an Unblocked bot account for this specific purpose.
* **Sign in** as an administrator in your Bitbucket Data Center instance.
* In the top navigation bar, click the admin icon.
* Under **Accounts**, select **Users**, then **Create user**.
* Create a new user account in Bitbucket Data Center with the following information:
* **Name:** Unblocked
* **Avatar:** download and use the Unblocked logo below
Download PNG
* Before the bot can access a project, it must be able to sign in to Bitbucket Data Center.
* Go to **Administration** > **Users**.
* Find your bot user and ensure it is assigned to a group.
* Go to **Administration** > **Global Permissions**.
* Ensure that group has the **Bitbucket User** permission.
* For each project Unblocked should review, navigate to **Project settings** > **Permissions**.
* Add the bot user and set the permission as "**Developer**" or above.
In Unblocked, search for the bot account you just created and select it. You may be required to authorize this account with Unblocked.
In order to successfully authorize your bot account, you need to be logged in with that account in Bitbucket Data Center.
For GitLab Cloud repositories, code review comments need to be posted on behalf of a GitLab account. We recommend creating an Unblocked bot account for this specific purpose.
You can use either a GitLab service account or a regular GitLab user account.
Regular users connect with OAuth, while service accounts connect with a token.
Decide which GitLab account type Unblocked should use for code review, then follow the matching instructions.
**GitLab service account**
* Create a [GitLab service account](https://docs.gitlab.com/user/profile/service_accounts/) for the top-level group.
* Create a token for the service account:
* From the service account page, select **Manage access tokens**.
* Click **Add new token**.
* Select the **api** and **read\_user** scopes.
* Click **Generate token** and copy the token.
**Regular GitLab user account**
* Create a new account in GitLab.
* In GitLab, set the regular user's profile information:
* **Name:** Unblocked
* **Avatar:** download and use the Unblocked logo below
Download PNG
* In GitLab, **sign in** as an Owner for the top-level group that contains the repositories Unblocked should review.
* In the top-level group, click **Manage** in the left navigation and select **Members**.
* Click **Invite members**.
* Invite the GitLab account you created for code review.
* Set the role as "**Developer**" or above and click "**Invite**".
In Unblocked, search for the GitLab account you created for code review and select it. If you select a regular user account, Unblocked will prompt you to authorize that account with GitLab. If you select a service account, Unblocked will prompt you to enter the token you created in GitLab.
Service accounts connect with a token and do not use the GitLab OAuth flow. Regular user accounts still use OAuth, so you need to be logged in to GitLab with that account when authorizing it.
For GitLab Self-Managed repositories, code review comments need to be posted on behalf of a GitLab account. We recommend creating an Unblocked bot account for this specific purpose.
You can use either a GitLab service account or a regular GitLab user account.
Regular users connect with OAuth, while service accounts connect with a token.
Decide which GitLab account type Unblocked should use for code review, then follow the matching instructions.
**GitLab service account**
* Create a [GitLab service account](https://docs.gitlab.com/user/profile/service_accounts/) in your GitLab instance.
* Create a token for the service account:
* From the service account page, select **Manage access tokens**.
* Click **Add new token**.
* Select the **api** and **read\_user** scopes.
* Click **Generate token** and copy the token.
**Regular GitLab user account**
* Create a new account in your GitLab instance.
* In GitLab Self-Managed, set the regular user's profile information:
* **Name:** Unblocked
* **Avatar:** download and use the Unblocked logo below
Download PNG
* In GitLab Self-Managed, **sign in** as an Owner or instance administrator for the top-level group that contains the repositories Unblocked should review.
* In the top-level group, click **Manage** in the left navigation and select **Members**.
* Click **Invite members**.
* Invite the GitLab account you created for code review.
* Set the role as "**Developer**" or above and click "**Invite**".
In Unblocked, search for the GitLab account you created for code review and select it. If you select a regular user account, Unblocked will prompt you to authorize that account with GitLab Self-Managed. If you select a service account, Unblocked will prompt you to enter the token you created in GitLab.
Service accounts connect with a token and do not use the GitLab OAuth flow. Regular user accounts still use OAuth, so you need to be logged in to GitLab with that account when authorizing it.