

Before you connect
Make sure you have:- The publicly reachable HTTPS endpoint for the MCP server you want to connect. Local, private-network, and HTTP endpoints aren’t supported.
- An MCP server that supports tool discovery and provides clear, accurate descriptions for its tools. This can be a hosted third-party server or one operated by your team.
Unblocked uses
annotations.readOnlyHint when the MCP server provides it. If the hint is missing, Unblocked evaluates the tool’s description and excludes tools that might modify data. Only tools determined to be safely read-only are available for selection.Connect a custom MCP server
1
Open Custom MCP settings
In the Unblocked sidebar, click Settings, then Data Sources, then Connect another data source. Select Custom, then select Custom MCP.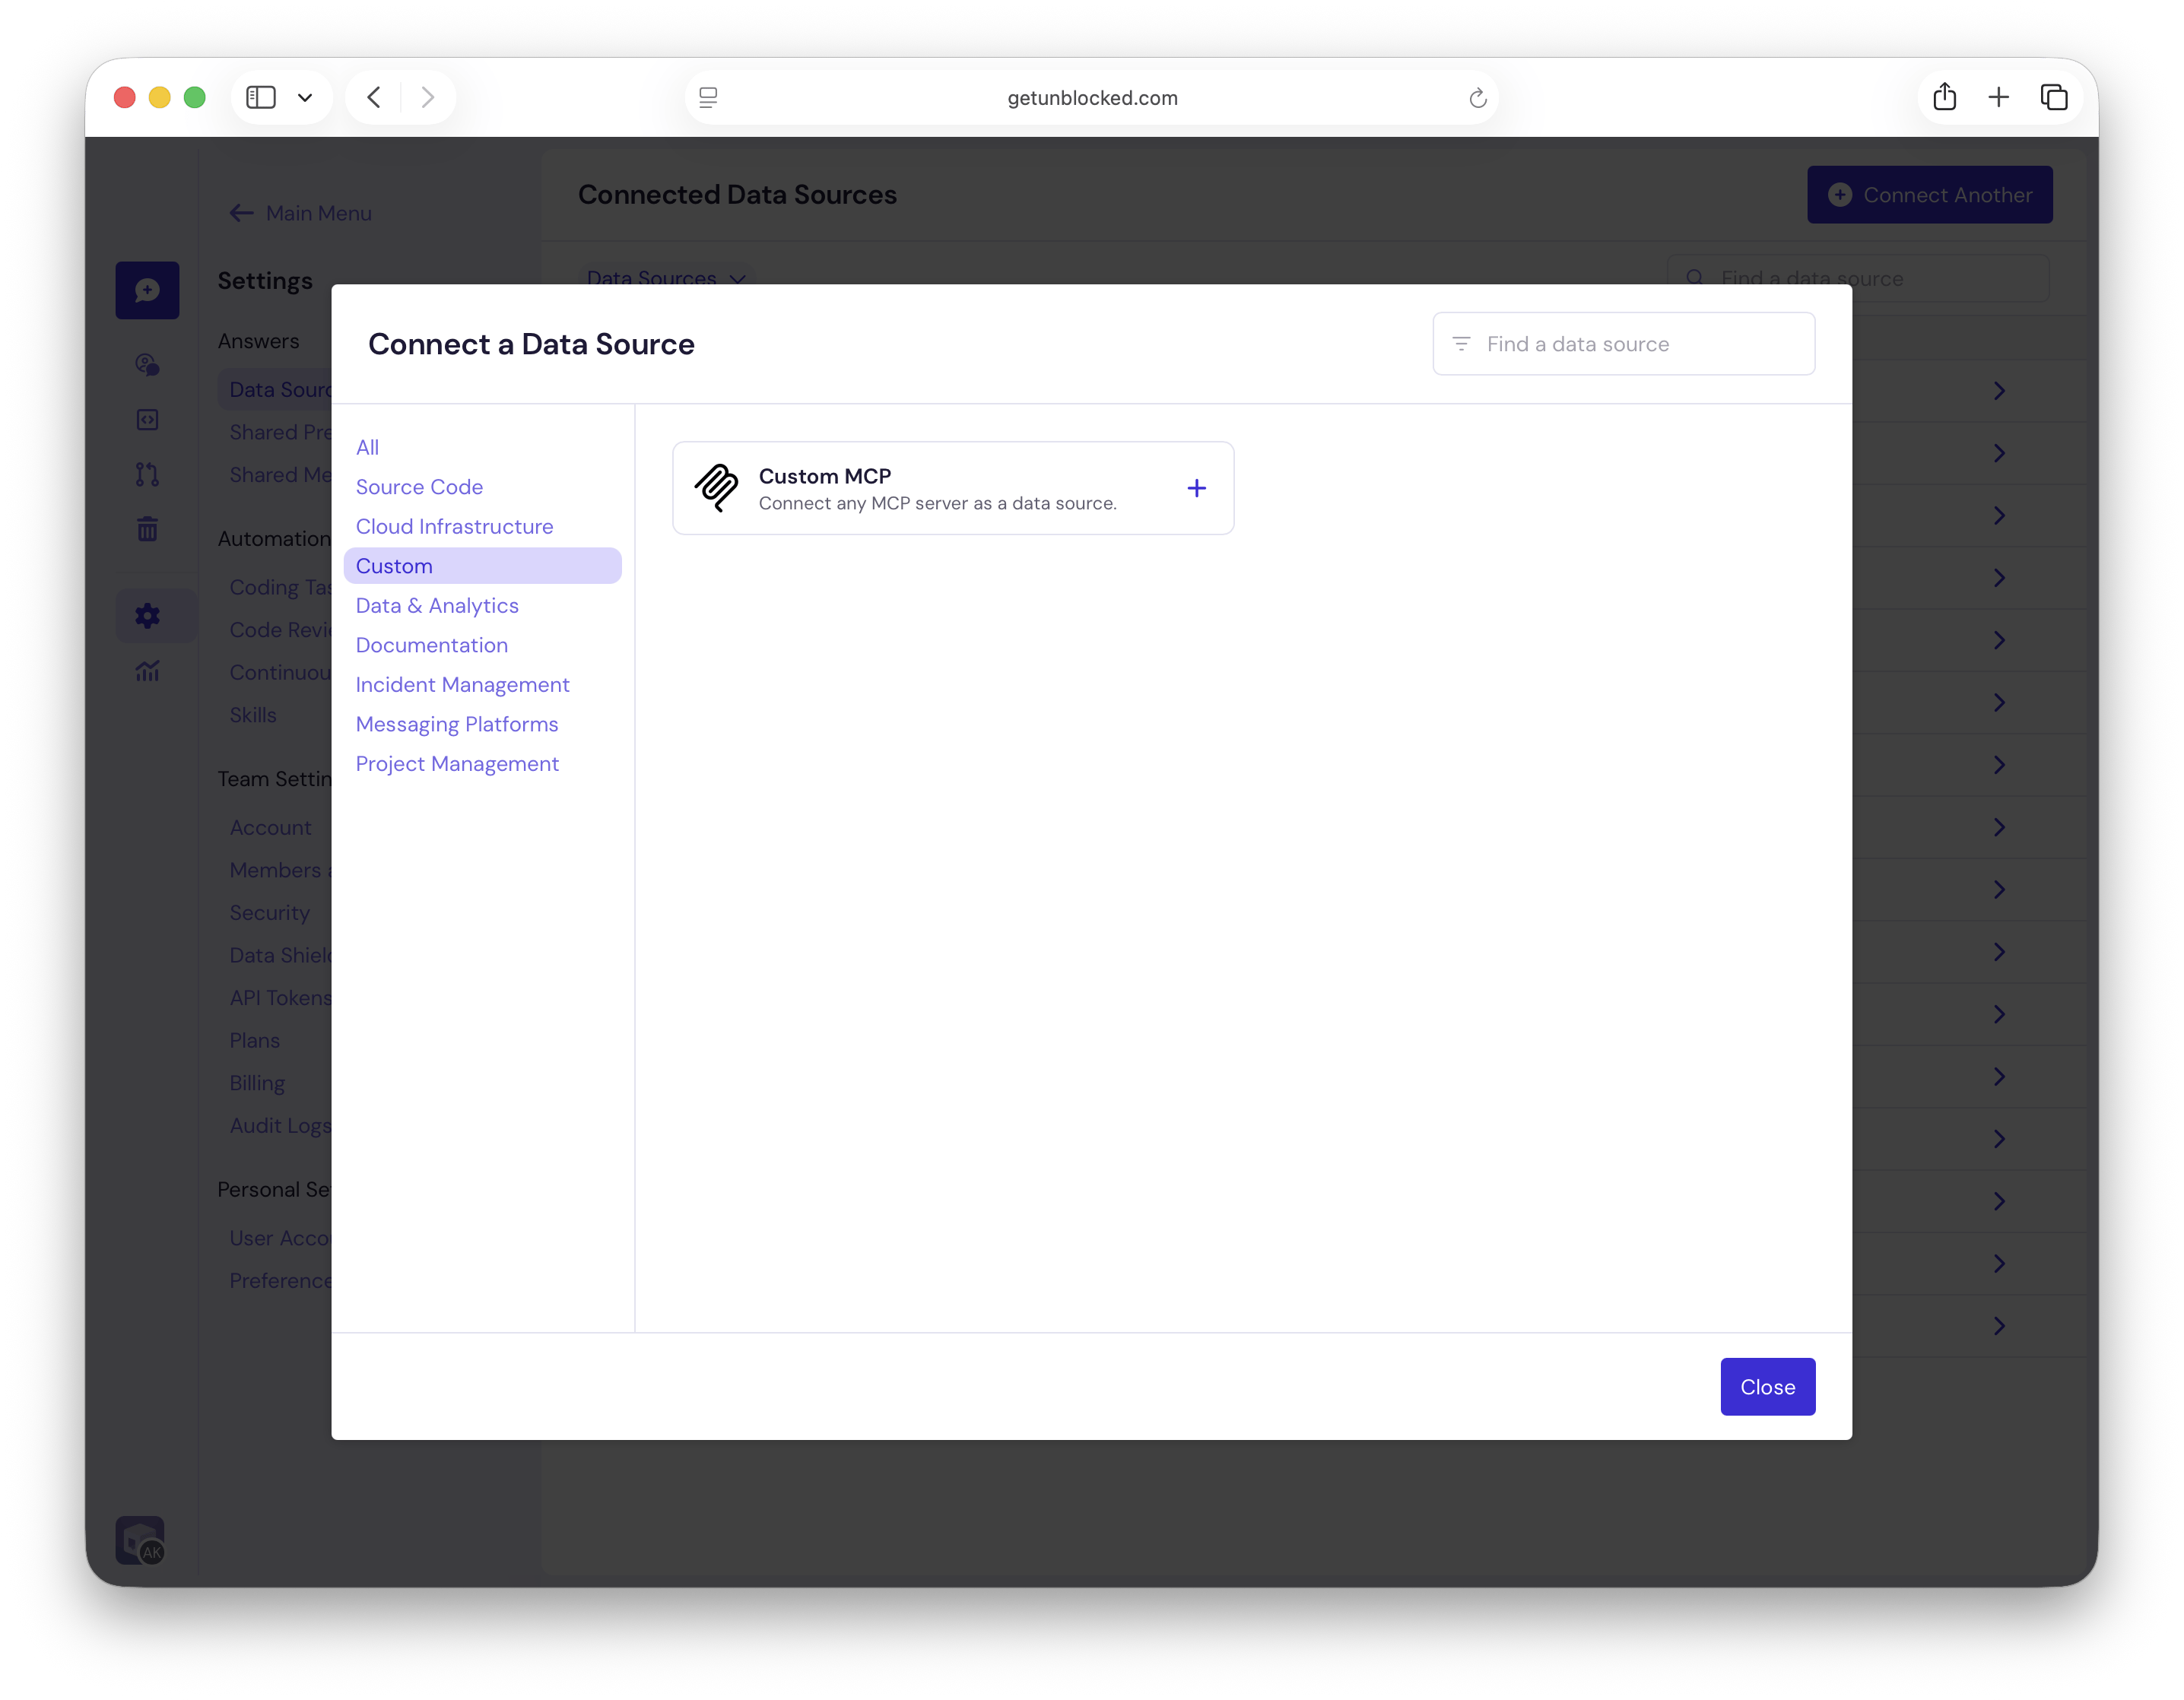
2
Enter the server details
Complete the connection form: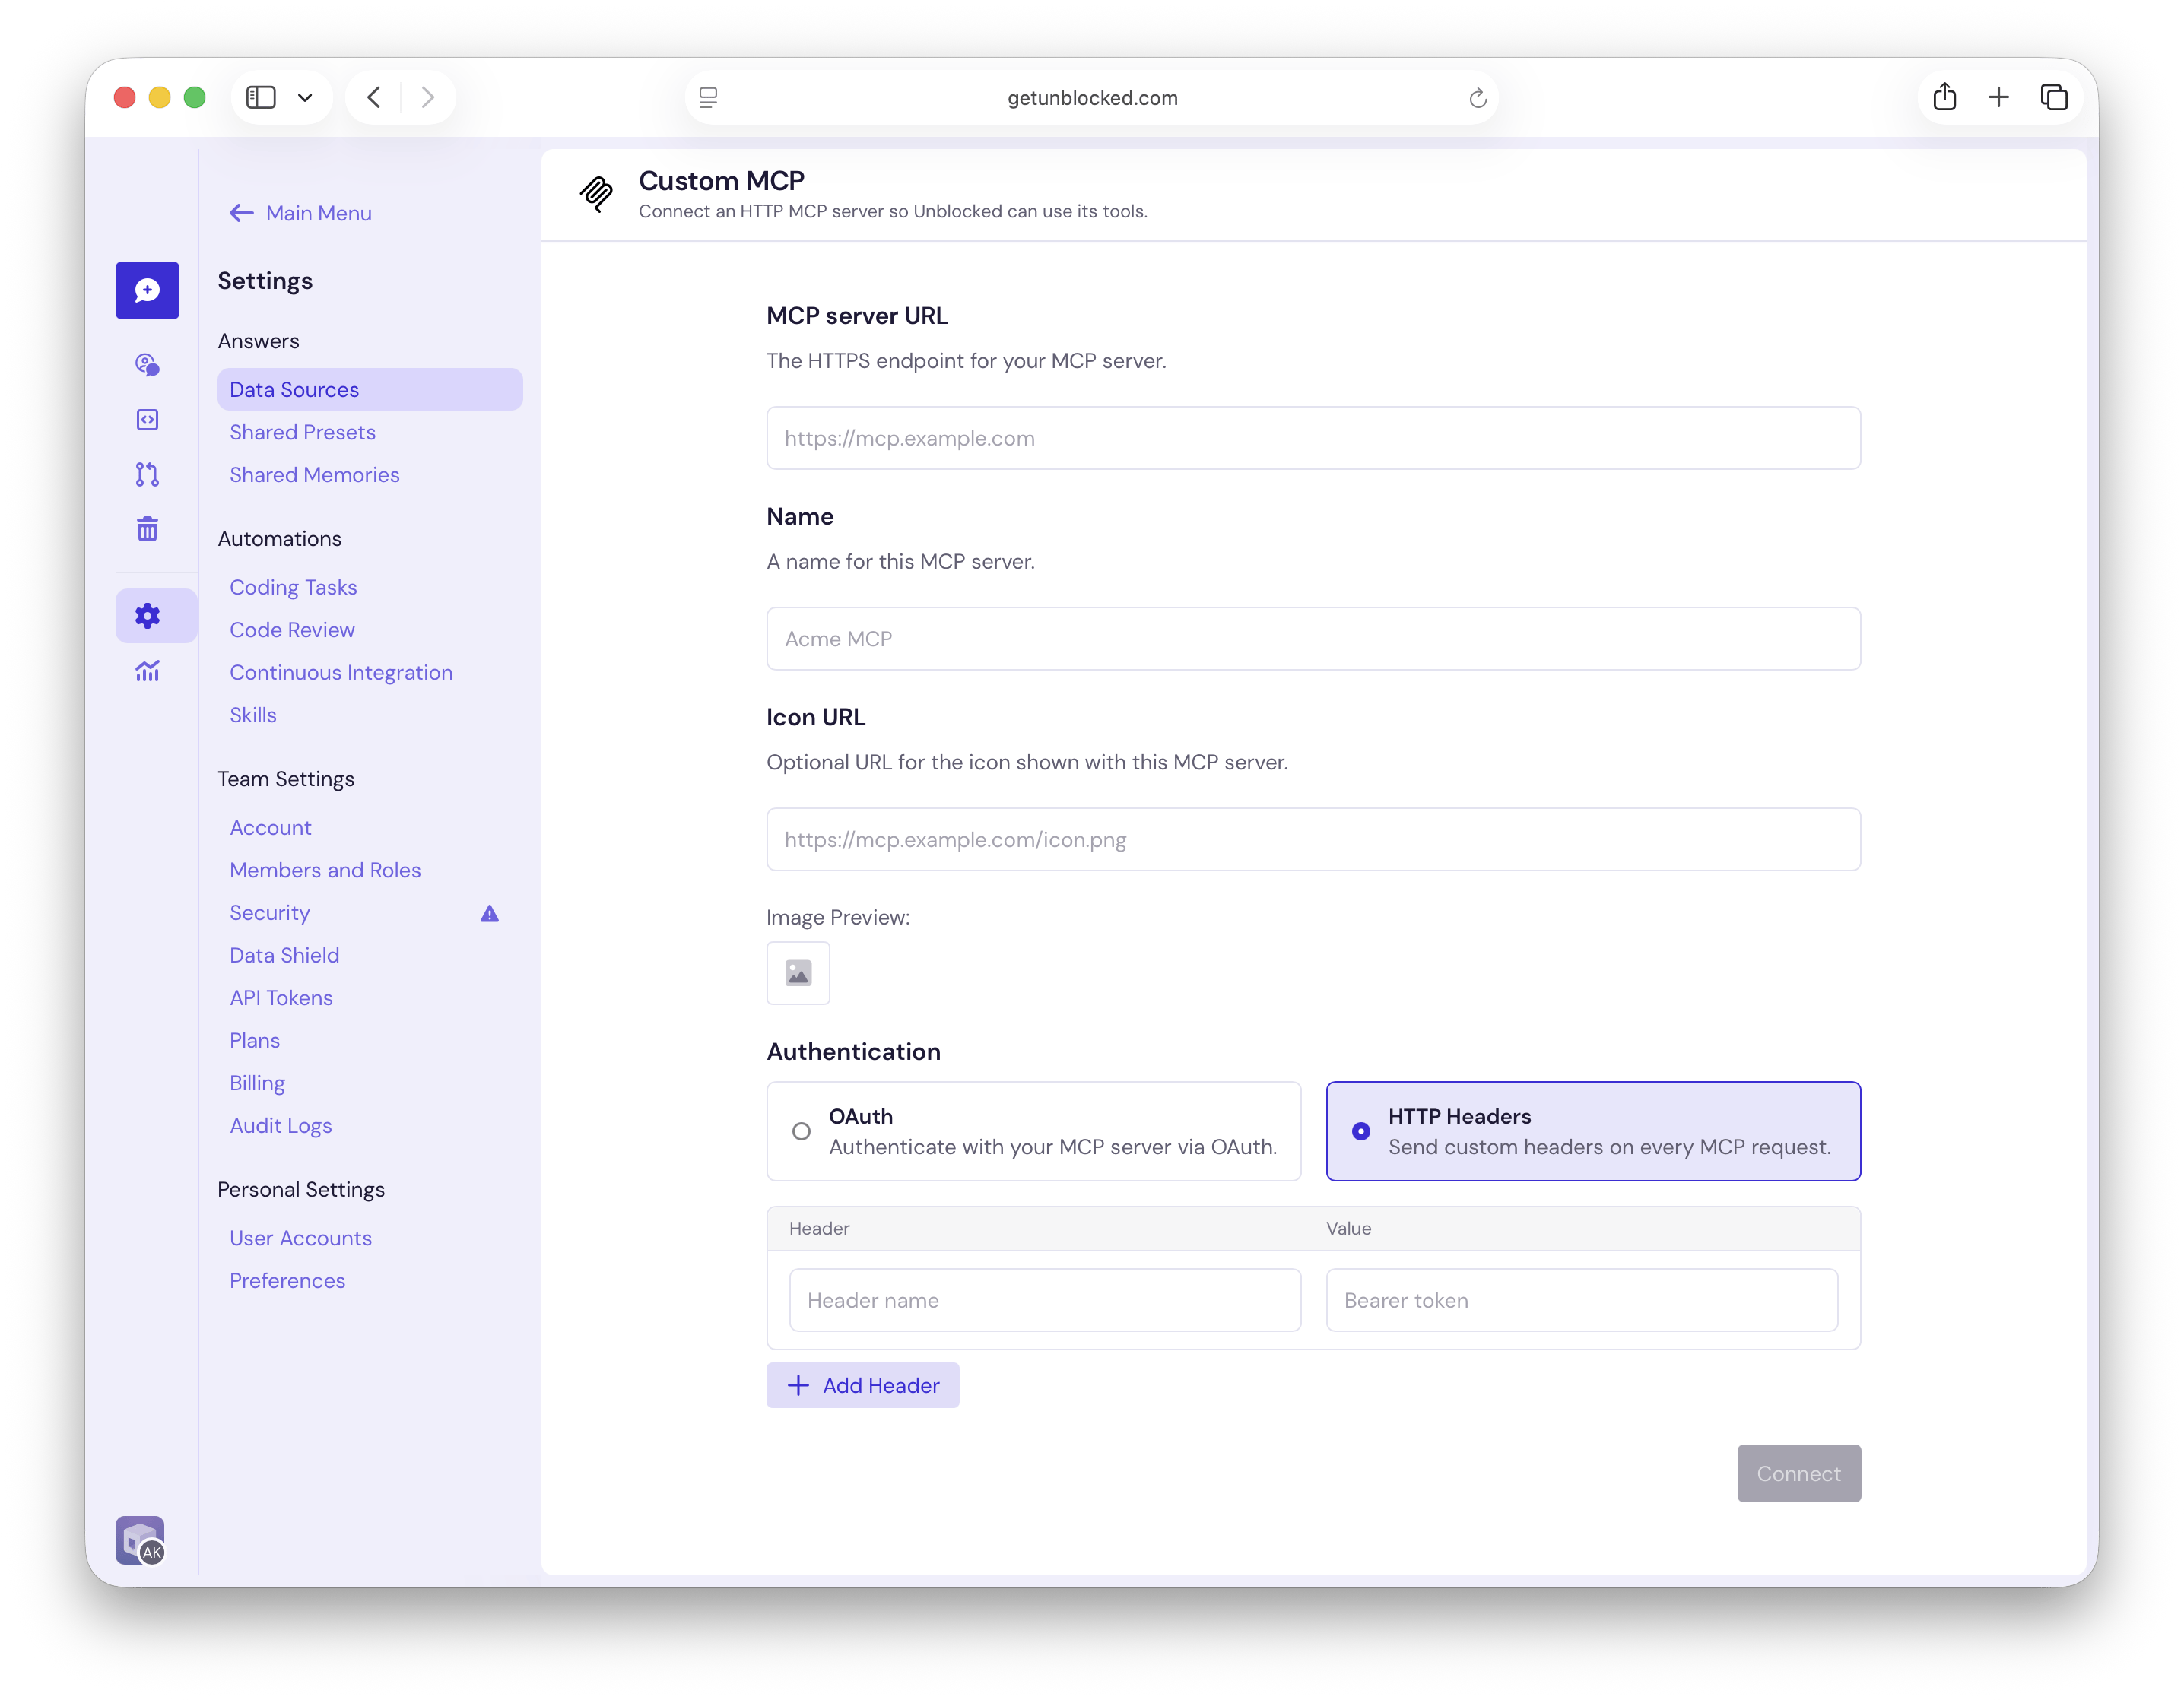
- MCP server URL: The public HTTPS endpoint for the MCP server, including its MCP path when required. For example,
https://mcp.example.com/mcp. - Name: Unblocked generates a name from the server URL. You can replace it with a more recognizable name.
- Icon URL: Unblocked generates an icon from the server URL. You can replace it with another public image URL.
-
OAuth: Select this option if your MCP server supports OAuth. When you click Connect, you’re redirected to the MCP server to authorize access.
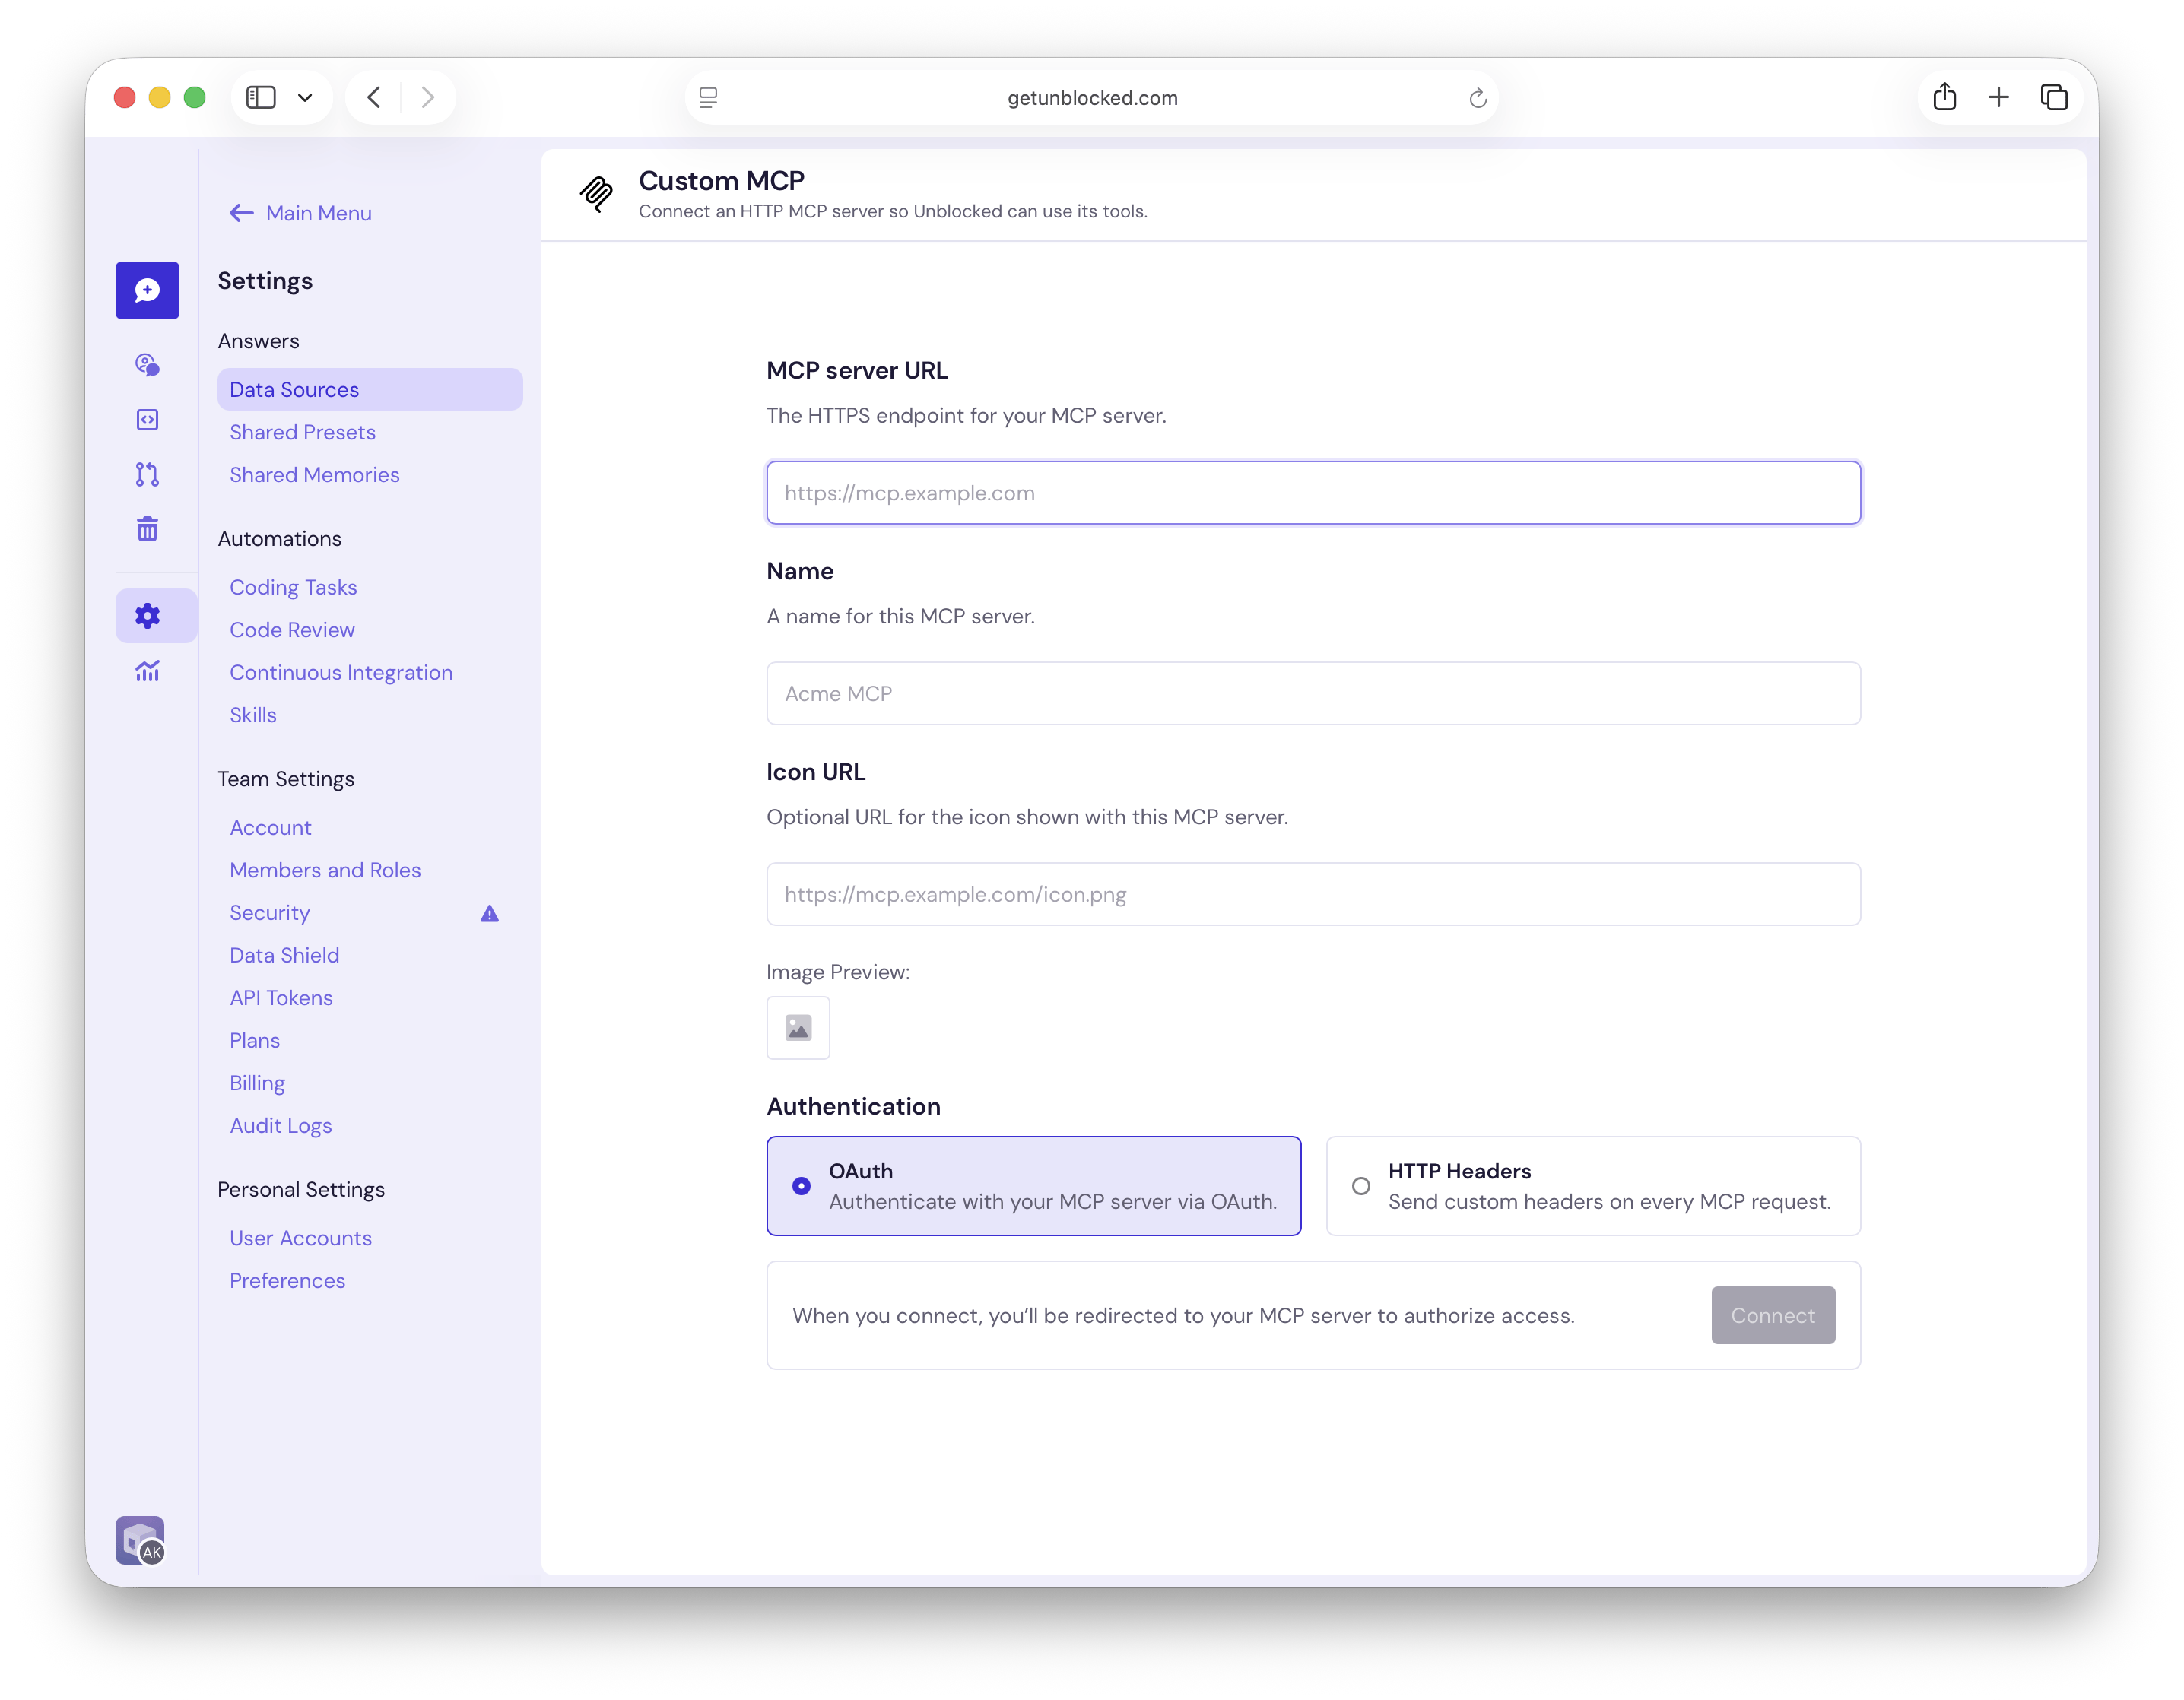
- HTTP Headers: Select this option to send custom headers with every MCP request. Enter both a name and value for each header, and click Add Header if the server requires more than one.
Authorization as the header and Bearer YOUR_TOKEN as its value. Use the header names required by your MCP server for other authentication methods.3
Select tools
Select the read-only tools that Unblocked can use. Use the filter to find a tool by its name or description, or use the MCP Tools checkbox to select or clear all tools.Tools that can modify data don’t appear in this list.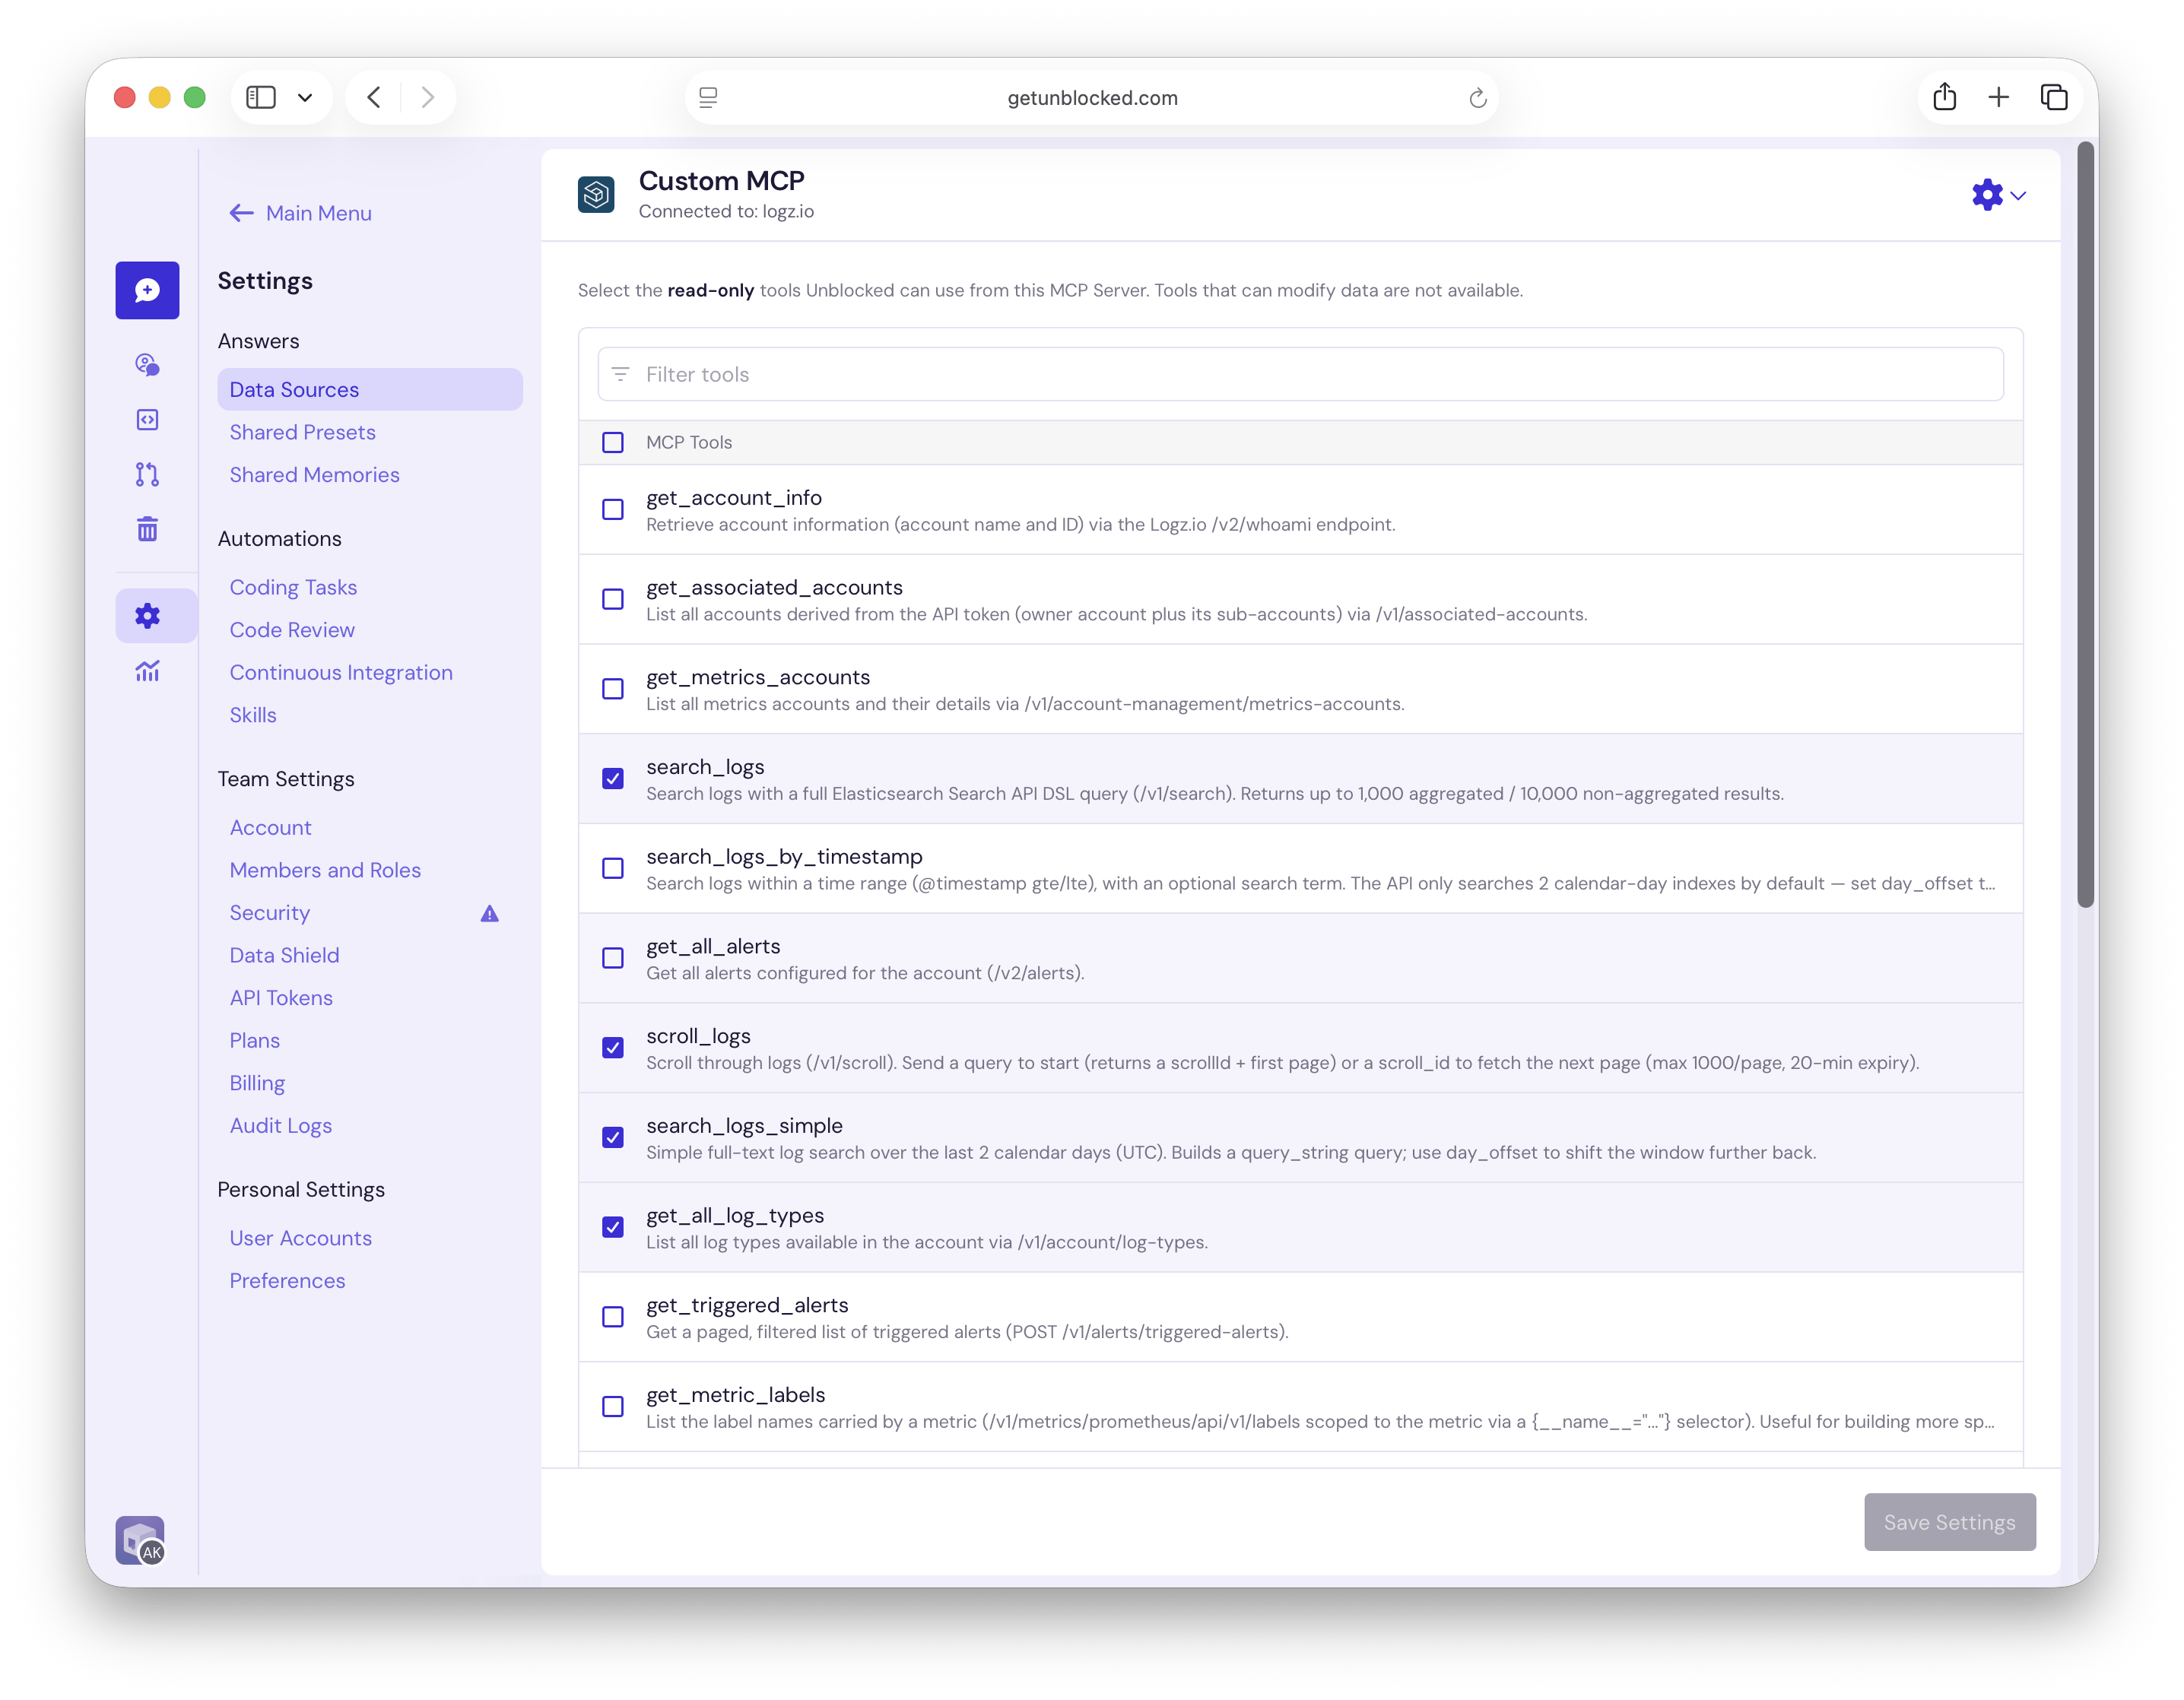
Authentication and access
With OAuth, Unblocked redirects you to the MCP server to authorize access. With HTTP headers, Unblocked encrypts the values you provide and sends them with every request to the MCP server. Use a dedicated, least-privilege credential that grants access only to the data the selected tools need. The tool names and descriptions returned by your MCP server help Unblocked decide when to use each tool. Use clear descriptions that explain what each tool returns and when it is useful.Enable Data Shield
Data Shield lets each team member use a Custom MCP data source with their own account and permissions. It is available for connections that use OAuth. Connections that use HTTP Headers do not support Data Shield. With Data Shield off, Unblocked uses the shared credentials configured when the data source was connected. Team members can receive information accessible to that shared account without connecting their own accounts. With Data Shield on, each member must connect their own account. Unblocked calls the MCP server with that member’s credentials, so the server applies their permissions. Only tools selected for the data source and available to that member can be used. If their account is disconnected or access is revoked, they must reconnect; Unblocked does not fall back to the shared account.Custom MCP data sources protected by Data Shield can only be used in personal threads. Start a personal thread to use these tools.
Turn on Data Shield for a connection
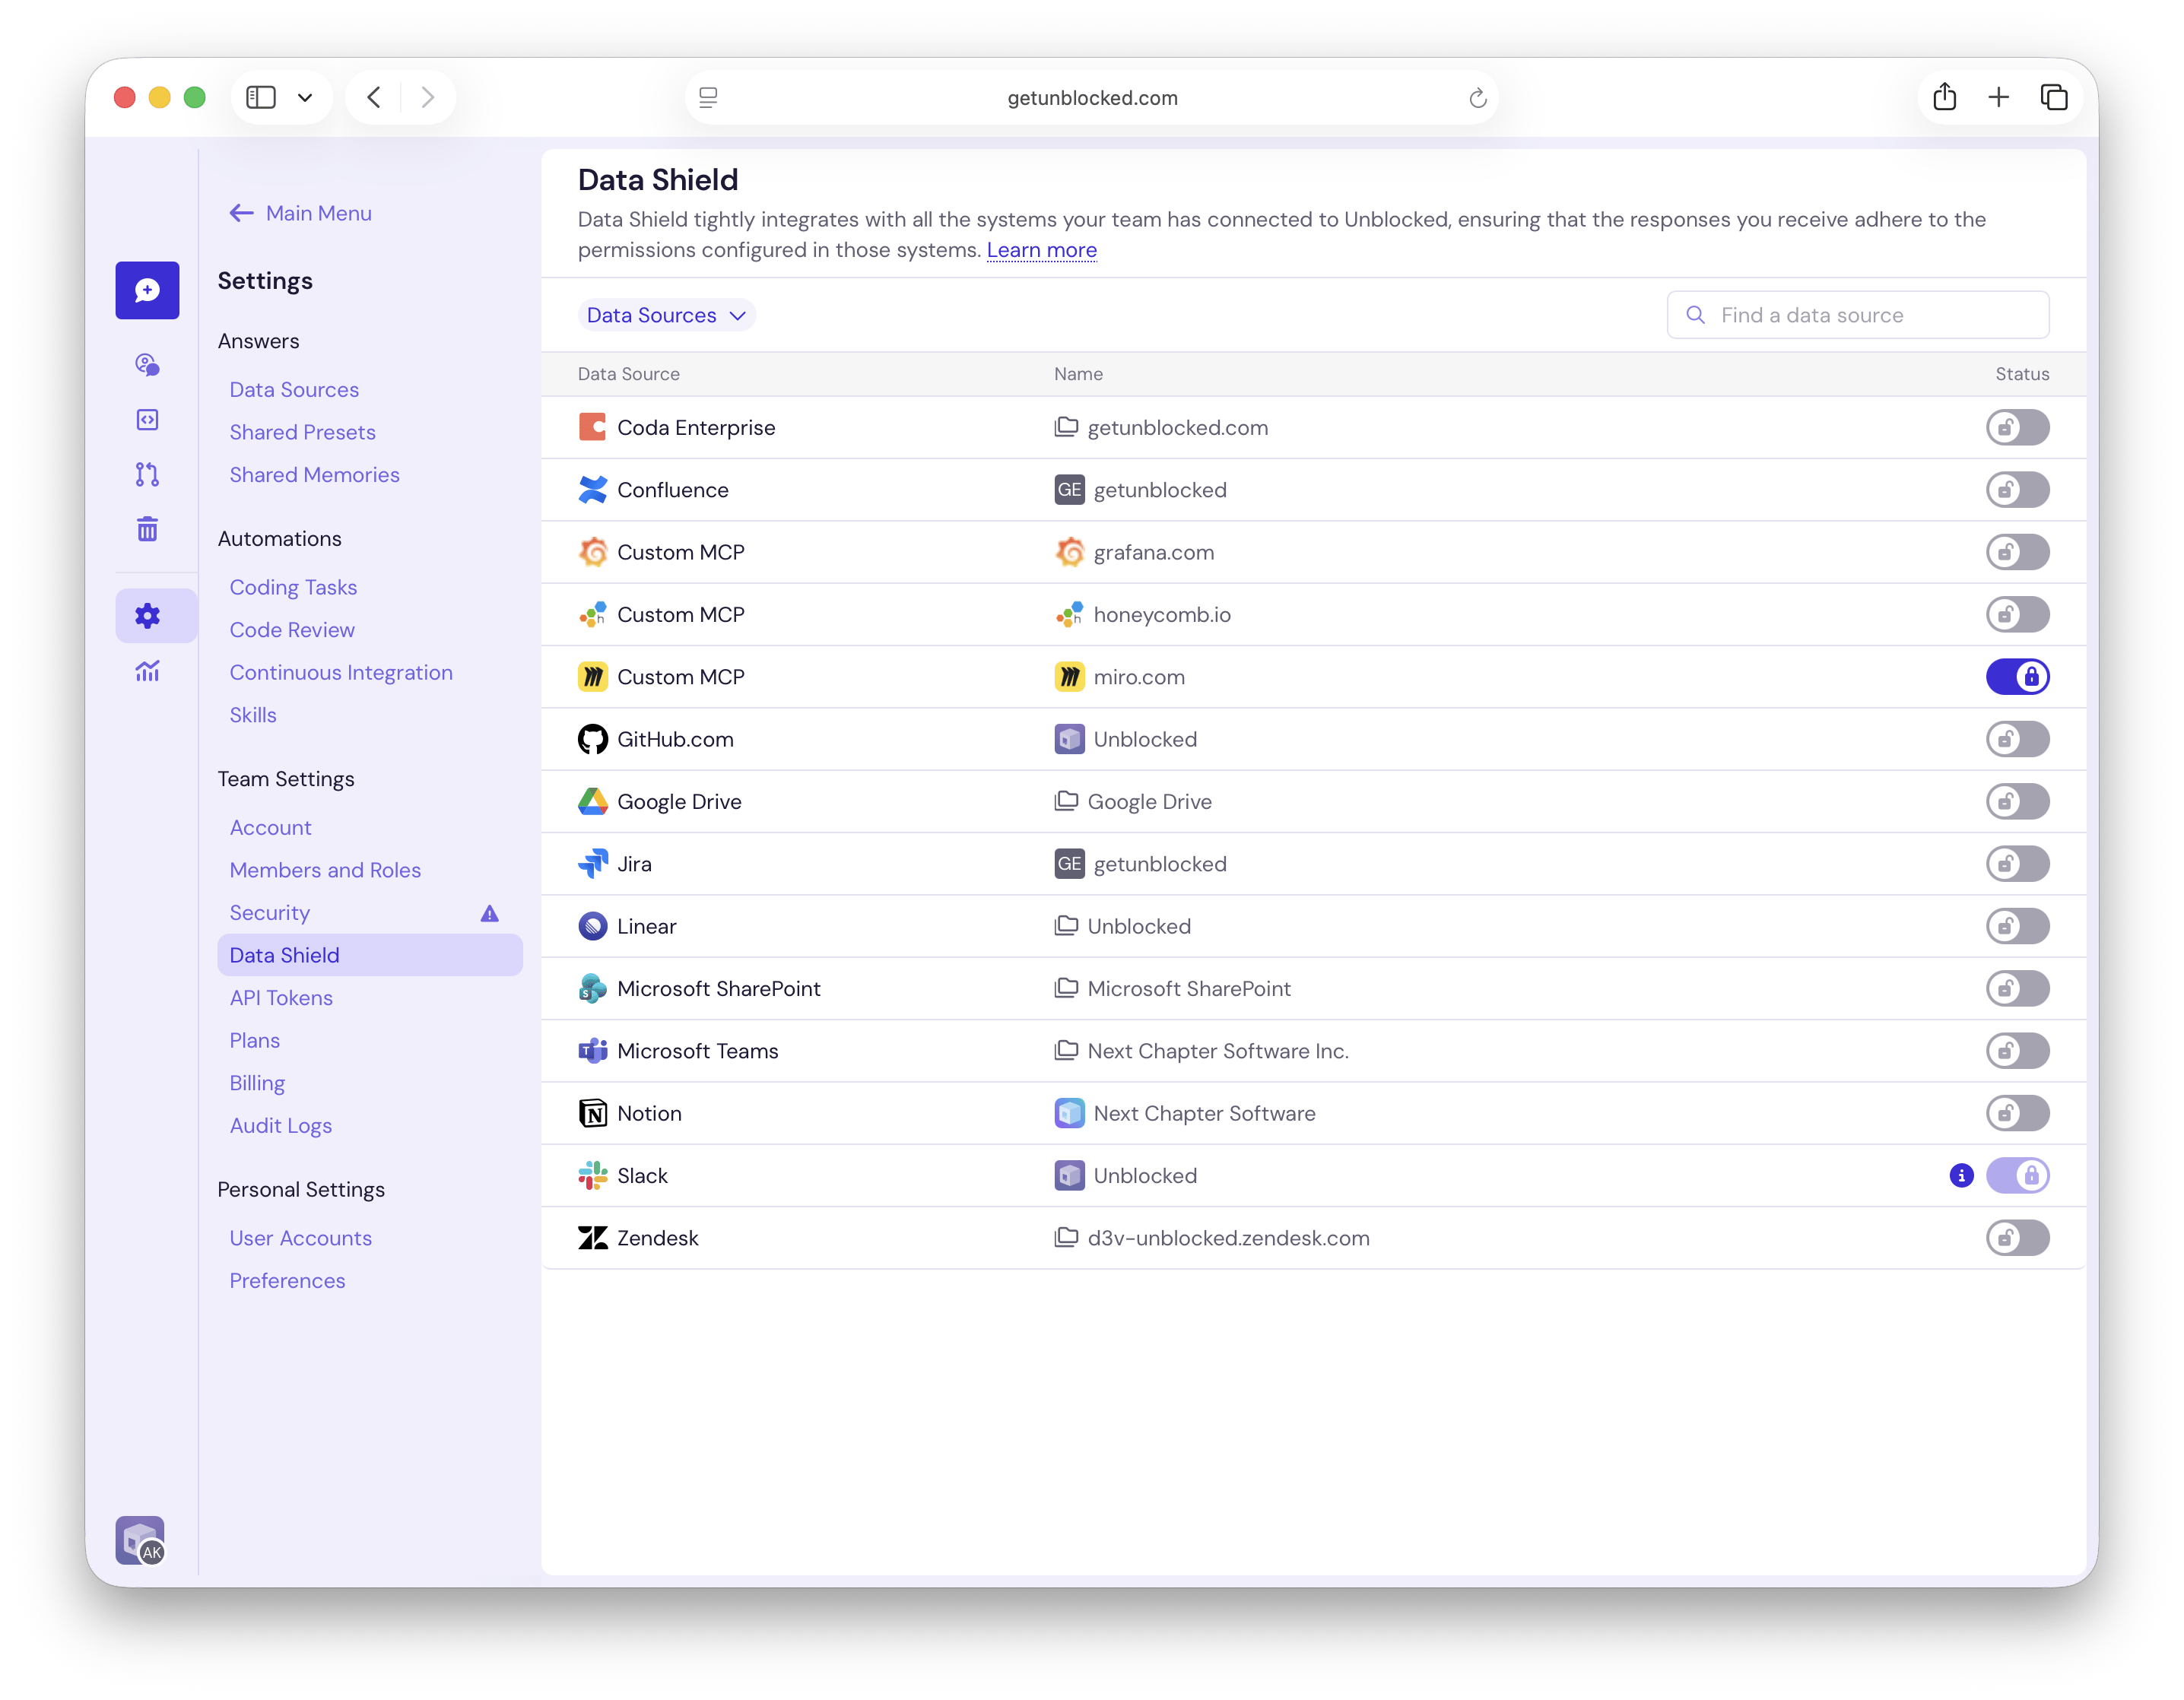
An Unblocked admin can enable Data Shield after connecting the MCP server with OAuth.- Go to Settings › Data Shield.
- Find the Custom MCP row for your connection. Use the Name column to distinguish between multiple MCP servers.
- Turn on its Status toggle, review the explanation, and click Enable Data Shield.
miro.com.
How users connect their accounts
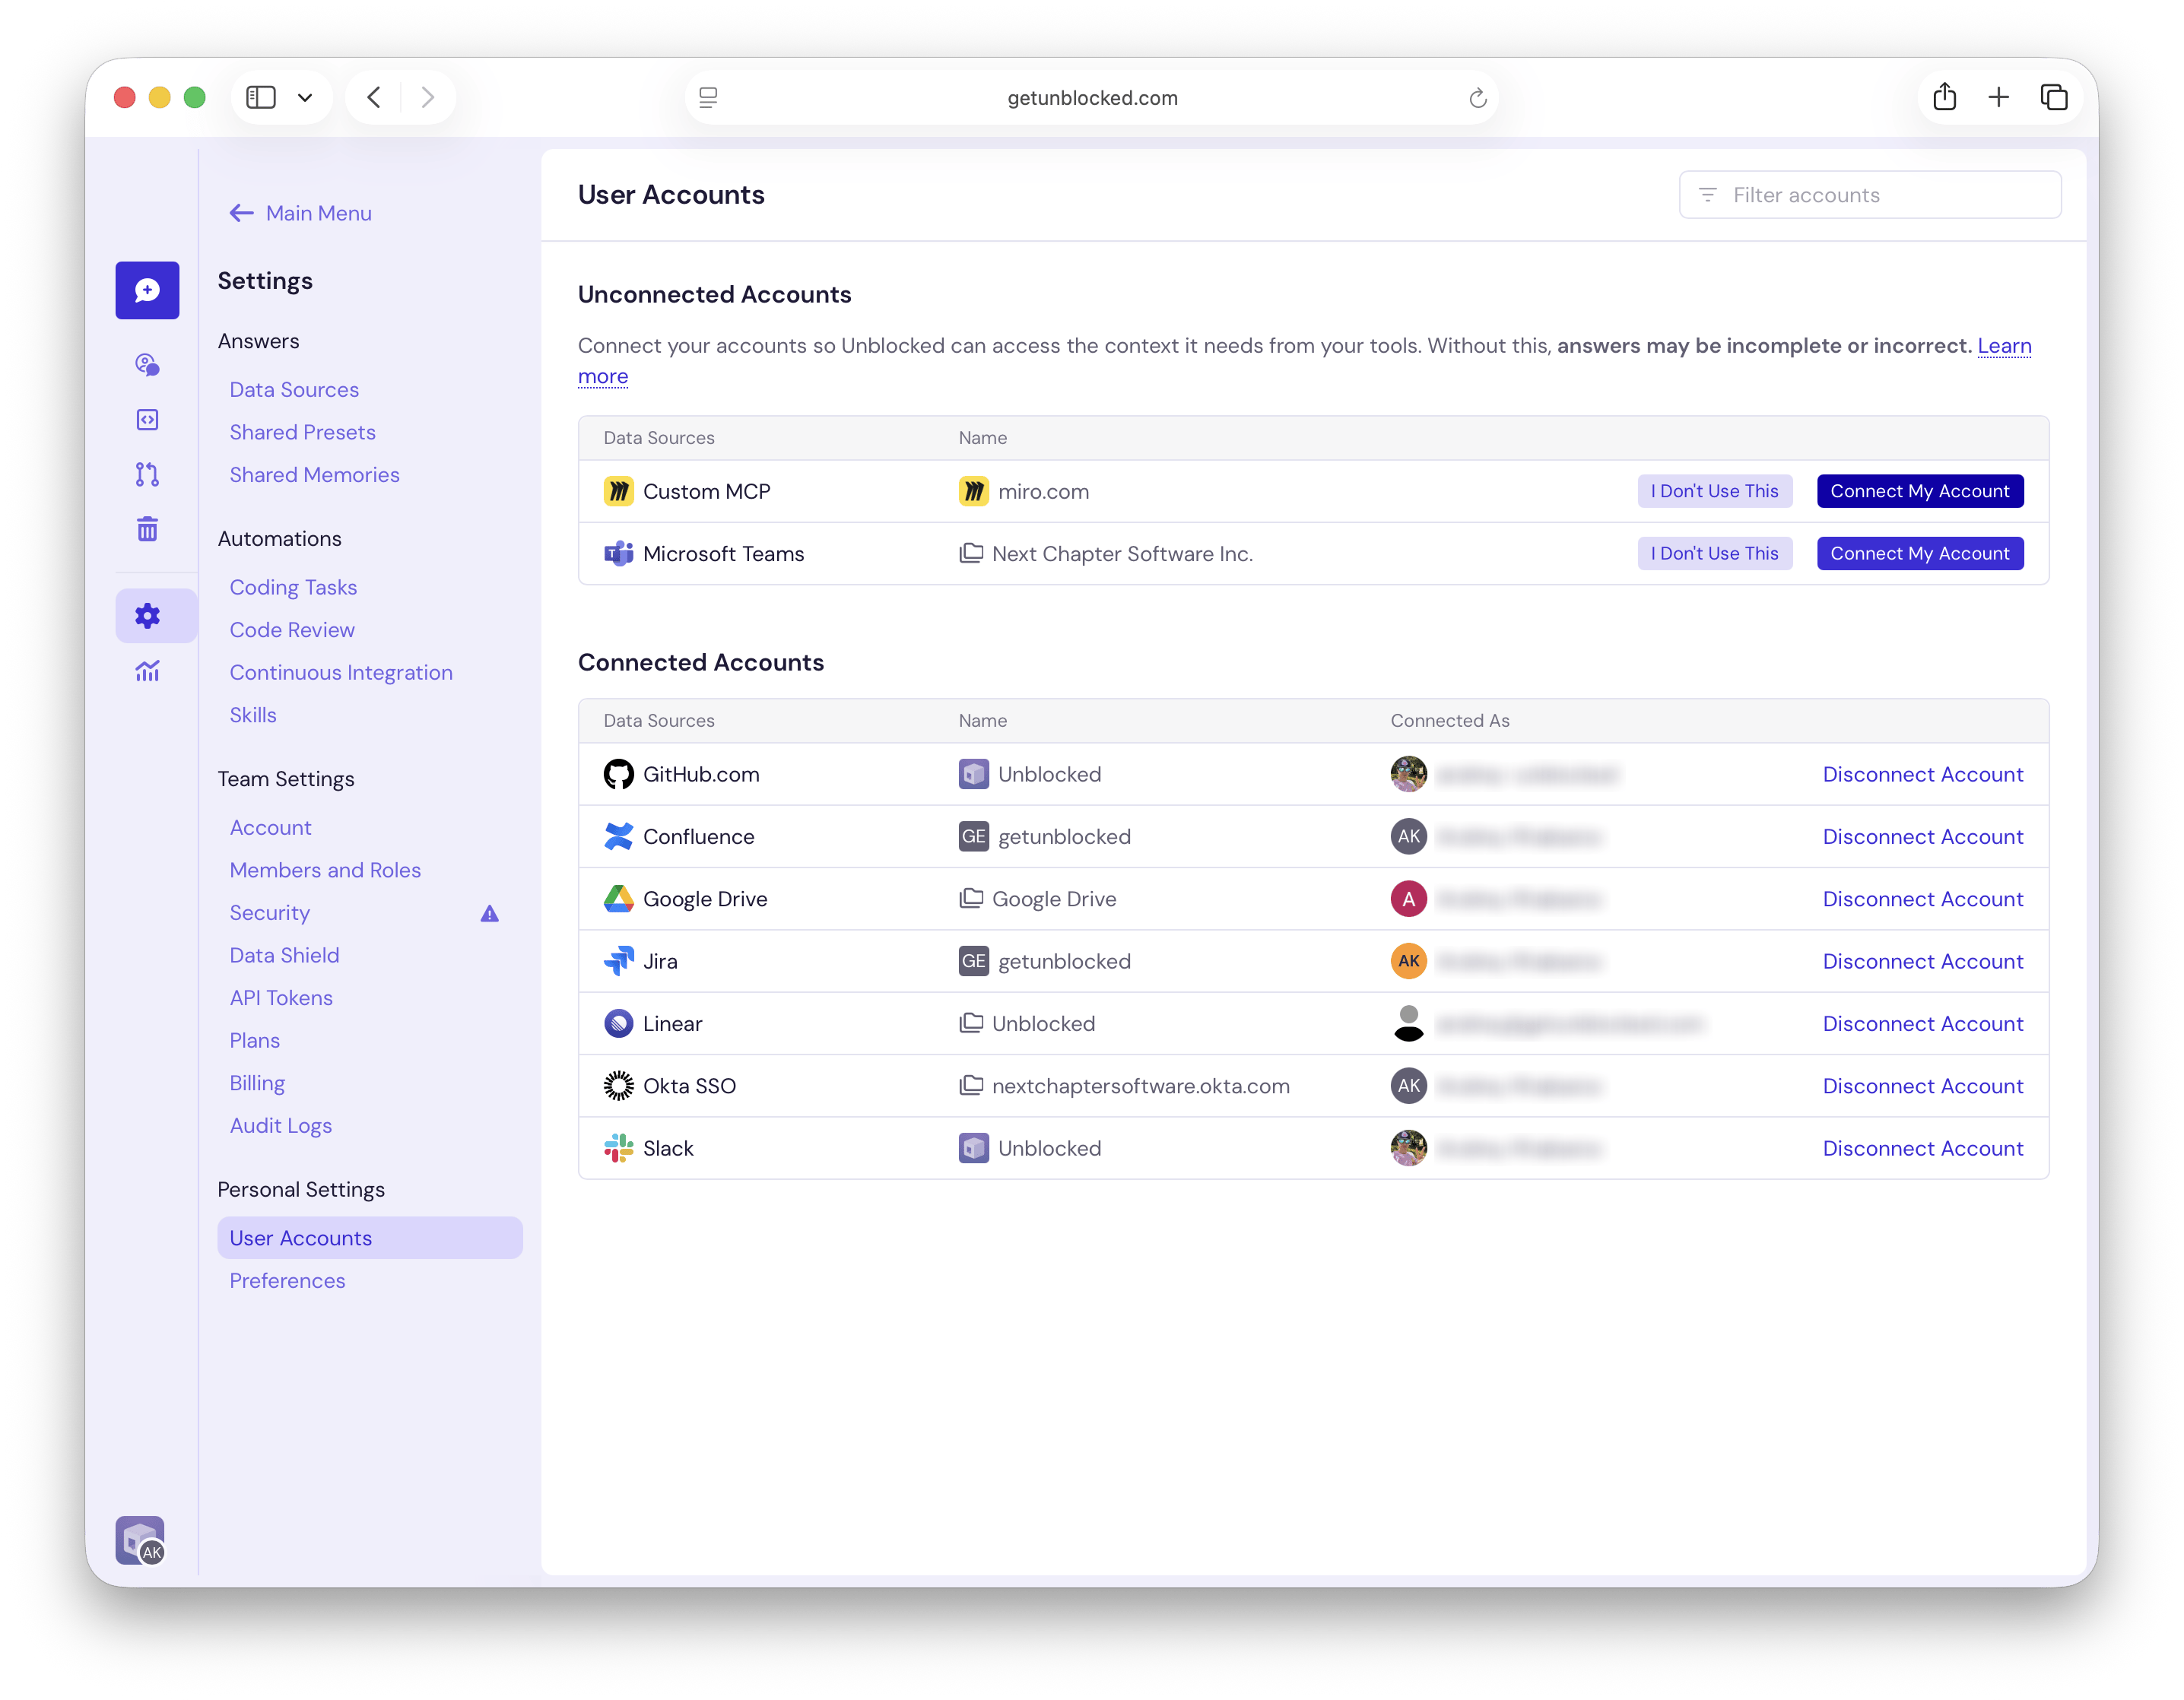
After an admin enables Data Shield, each member completes these steps, including the person who originally connected the data source:- Go to Settings › User Accounts under Personal Settings.
- Under Unconnected Accounts, find the Custom MCP connection by name and click Connect My Account.
- Sign in to the service with your own account and authorize access.
Manage the connection
To change the available tools, go to Settings › Data Sources, open the custom MCP data source, update the selection, and click Save Settings. Use the settings menu on the data source to manage or disconnect it.Troubleshooting
The Connect button is unavailable
Check that:- MCP server URL and Name aren’t empty.
- Every HTTP header row has both a name and a value, or is completely empty.
- Header names are unique. Header-name matching isn’t case-sensitive.
Unblocked can’t connect to the server
Confirm that the URL:- Starts with
https://. - Points to the MCP endpoint, not only the server’s website or API root.
- Resolves to a host that is reachable from the public internet.
- Supports the selected authentication method and responds within one minute.